
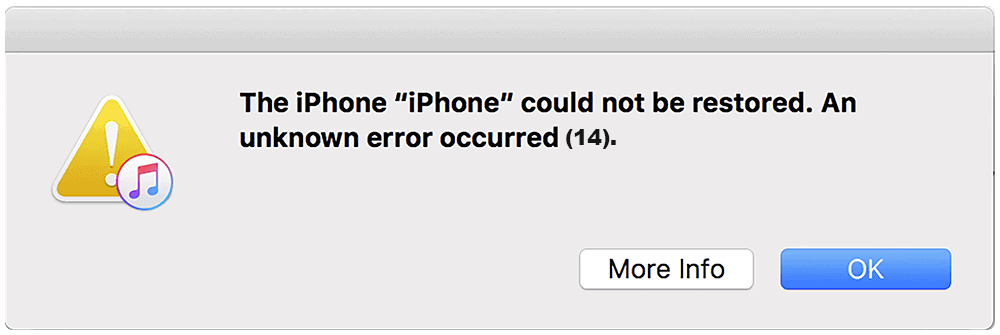
There’s nothing more frustrating than getting an error message when you’re trying to update your iPhone. The “iPhone Could Not Be Updated Error 14“, also known as iTunes error 14, can be especially irritating. This error typically pops up when attempting to upgrade or restore your iOS device through iTunes.
As someone who has personally dealt with this issue, I understand the panic you might feel in that moment. But don’t worry, after extensive research and testing, I’ve put together the ultimate guide to resolving iPhone Error 14. Having successfully fixed this problem for myself and others, I can confidently walk you through the steps.
First, let’s look at some of the common causes behind Error 14:
- Faulty or uncertified USB cable
- Outdated iTunes or operating system version
- Unstable network connection during the update
- Corrupted or incompatible IPSW (iPhone Software) file
- Insufficient storage space on your device
Now that we know the potential culprits, let’s dive into the troubleshooting process. Here are proven methods to fix your iPhone Could Not Be Updated Error 14, from easiest to most advanced:
Step 1: Check Your USB Cable and Ports
One of the simplest reasons for Error 14 is a bad USB cable or port. Here’s what to check:
- Make sure you’re using an authentic Apple USB cable or one that is MFi certified. Look for the “Made for iPhone/iPad/iPod” logo to verify.
- Try a different Apple cable if you have one handy.
- Plug the cable into another USB port on your computer.
- Test the cable with a different device to make sure it’s functioning properly.
- Avoid connecting through a USB hub and plug directly into your computer instead.
Step 2: Update iTunes and Your Computer’s OS
Outdated software is another common cause of iTunes errors. To rule this out:

- Open the App Store on your Mac or the Microsoft Store on your PC.
- Check for any available updates to iTunes.
- While you’re there, install any operating system updates as well.
- If no updates are found, you likely already have the latest versions.
Step 3: Delete and Replace the IPSW File
A corrupted IPSW file can prevent iTunes from updating your iPhone. To remove and redownload it:
- Close iTunes completely.
- Find the IPSW file location on your computer (see Apple’s support page for specific paths).
- Delete the IPSW file and reopen iTunes.
- Attempt to update your iPhone again. iTunes will redownload the file.
- Check that the file was removed from the original location.
Step 4: Manually Select the Correct IPSW
If removing the automatic IPSW didn’t do the trick, you can try manually choosing one:
- Download the appropriate IPSW file for your iPhone model and iOS version.
- Launch iTunes and connect your iPhone.
- On a Mac, hold down the Option key and click “Update”. On Windows, hold Shift instead.
- Select the IPSW file you downloaded earlier.
- Allow your iPhone to update and see if Error 14 is resolved.
Step 5: Try Fixing Related iTunes Errors
Error 14 is not the only issue you might face when updating your iPhone. Some other common errors include:
- iPhone Error 4013: This indicates a hardware issue, often with the USB cable or port. Double check your connections.
- iPhone Error 9: This usually means your iPhone couldn’t be restored due to a communication interruption. Ensure you have a stable internet connection.
- iPhone Won’t Restore: If you’re seeing a message that your iPhone could not be restored, force restart your device and try updating through Recovery Mode.
Many of the basic troubleshooting steps, like using a different cable or updating iTunes, can help resolve these related errors as well.
Step 6: Use a Dedicated iOS Repair Tool
If you’re still seeing iPhone Error 14, it’s time to bring out the big guns. Third-party iOS repair software can automatically diagnose and resolve many stubborn iTunes errors.
My top recommendation is Dr. Fone System Repair (iOS). I’ve used this tool with great success. It’s easy to use and fixes issues without affecting your data. Here’s a quick overview of how it works:

- Download and launch the Dr. Fone app on your computer.
- Connect your iPhone and click “System Repair“.
- Let the app detect your device model and download the latest firmware.
- Click “Start” to begin scanning and repairing any issues.
- Once complete, your iPhone should be error-free!
The standard mode repair process takes only a few minutes and preserves your data. In rare cases, you may need to try the advanced mode if standard doesn’t work.
Alternatively, Dr. Fone offers an iTunes Repair tool that focuses specifically on resolving issues with the iTunes program itself. This could be helpful if you suspect the problem lies with your iTunes installation rather than your iPhone.

Step 7: Recover Data from a Dead iPhone
In some extreme cases, updating failures can leave your iPhone unresponsive. If your device won’t turn on or gets stuck on the Apple logo after an update attempt, all hope is not lost.
Specialized data recovery software like Dr. Fone Data Recovery can help you extract your most important files from an iPhone that seems dead. This includes your contacts, messages, photos, videos, and more.
Of course, regularly backing up your iPhone is the best defense against major data loss. But if you find yourself with a bricked device, data recovery tools can be a lifesaver.
Step 8: Remove iCloud Lock (If Needed)
In a few cases, an iPhone’s iCloud Activation Lock can interfere with the update process. If you recently purchased a used iPhone or are unsure of its iCloud status, you may see an “iPhone is Linked to an Apple ID” message when trying to update.
The only legitimate way to remove an iCloud lock is by contacting the original owner and having them remove the device from their account. However, third-party iCloud removal tools do exist if you’re unable to get in touch with the previous owner.
Be cautious with iCloud unlocking services, as many are scams. Always research the reputation of any company before giving them your device information or payment.
Frequently Asked Questions (FAQs)
Q1: Can I fix the iPhone Could Not Be Updated Error 14 without a computer?
A1: No, a computer is necessary to troubleshoot and resolve the Error 14. Using iTunes or connecting to a computer via Recovery Mode provides the best chance of resolving the issue.
Q2: Will updating iTunes help fix Error 14?
A2: Yes, updating iTunes to the latest version can resolve compatibility issues and improve the update process. Make sure to check for updates regularly.
Q3: How long does it take to fix Error 14 on an iPhone?
A3: The time required to fix Error 14 can vary depending on the cause and the troubleshooting steps you take. In most cases, the issue can be resolved within an hour or two.
Q4: Will I lose my data if I fix Error 14 using Recovery Mode?
A4: When using Recovery Mode, your iPhone will be restored to its factory settings. This means all data on the device will be erased. Therefore, it’s crucial to create a backup before attempting this step.
Q5: What if none of the troubleshooting steps work?
A5: If you’ve followed all the troubleshooting steps and the Error 14 persists, contacting Apple Support is recommended. They have the expertise to provide further assistance and guide you through the resolution process.
Key Takeaways for Fixing iPhone Could Not Be Updated Error 14
- Start by checking your USB cable and updating iTunes
- Remove any old IPSW files that could be causing problems
- Hard reset your iPhone as a last DIY resort before seeking outside help
- Use a reliable third-party iOS repair tool to automatically diagnose and fix errors
- Be aware of related iTunes errors and how to troubleshoot them
- Have a plan for recovering data from a dead iPhone if needed
- Watch out for iCloud lock issues and use removal tools cautiously
No doubt, seeing the iPhone Could Not Be Updated Error 14 can induce panic. But I hope this guide has shown you that there are several ways to tackle the problem.
As someone who has personally resolved this error, my top recommendation is using Dr. Fone System Repair (iOS). It’s the quickest, easiest way to get your iPhone updating again without any data loss or frustration.
However, walking through the manual troubleshooting steps is also likely to provide a fix. It’s all about ruling out the potential causes one by one.
You’ve got this! With some patience and persistence, your iPhone Error 14 will soon be a thing of the past. Feel free to bookmark this guide for future reference or share it with other iPhone users who may be facing the same struggle.


