
As an iPhone user, you rely on your device to stay connected and productive. But when you encounter the dreaded iPhone Error 9, it can stop you in your tracks.
This frustrating error prevents you from syncing data or updating software. Your phone may get stuck on the Apple logo during startup, become unresponsive, or display cryptic error codes.
Don’t panic – many solutions can get your iPhone back up and running smoothly. This comprehensive guide will walk you step-by-step through all the possible fixes for iPhone Error 9.
By the end, you’ll have the knowledge to resolve Error 9 quickly whenever it pops up. Let’s get started!
What Causes iPhone Error 9?
Before we dive into the fixes, it helps to understand what causes Error 9 in the first place. The main culprits include:
- Software bugs during iOS updates
- Connectivity issues with iTunes
- Corrupt files or incomplete software updates
- Incompatible apps or accessories
- Outdated software versions
- Hardware problems like Bad USB cable
Luckily, most issues that lead to Error 9 can be resolved through troubleshooting. The key is finding the right solution for your specific situation.
Fix #1: Put Your iPhone Into Recovery Mode
The first thing to try when you encounter Error 9 is to put your iPhone into Recovery Mode. Here are the steps:
- Connect your iPhone to your computer using the USB cable.
- Launch iTunes on your computer.
- Press and hold the Power button and Home button on your iPhone simultaneously until you see the Recovery Mode screen.
- In iTunes on your computer, you’ll get a prompt to Restore or Update your iPhone. Click Restore.
This will reinstall the latest version of iOS on your iPhone and resolve any software issues causing Error 9.
However, Recovery Mode will erase all data on your iPhone. So first, back up your iPhone so you don’t lose anything important.
Recovery Mode is most effective for iPhone Error 9 issues caused by software bugs or incomplete updates. If the error persists after restoring your iPhone, move on to the next fixes.
Fix #2: Update to the Latest iTunes Version
An outdated version of iTunes on your computer is another common culprit behind iPhone Error 9. To rule this out:
On Windows:
- Open iTunes and click Help > Check for Updates.
- Download and install any iTunes updates.
- Restart your computer when done.
On Mac:
- Click iTunes in the menu bar and select Check for Updates.
- Download and install any updates available.
- Restart your Mac when finished.
Updating iTunes resolves compatibility issues between your computer and iPhone that can trigger Error 9 when syncing or restoring.
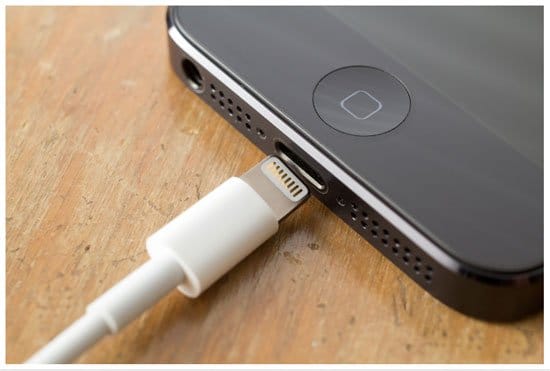
Fix #3: Use a Different USB Cable
It seems basic but a faulty Lightning cable is often the reason behind iPhone Error 9. The cable may be damaged, outdated, or simply dirty inside the ports.
Try these steps:
- Inspect your cable for any visible damage. Replace it if the USB connector or ports are bent or broken.
- Swap out the current cable with a brand new Apple MFi-certified Lightning cable. Non-certified cables can cause issues.
- Try connecting your iPhone to a different USB port on your computer.
- Plug the cable into your iPhone first, then into the computer’s USB port.
- Check for lint, debris or moisture inside the iPhone’s Lightning port. Clean it out with compressed air.
- Toggle between cables while iPhone is plugged into computer to reset connection.
With a properly functioning Lightning cable, Error 9 should no longer appear when syncing or restoring your iPhone.
Fix #4: Hard Reset Your iPhone
If Error 9 shows up during an iOS update or when your iPhone is unresponsive, try hard resetting your device:
- Press and hold the Power button and Home button simultaneously for at least 10 seconds, until you see the Apple logo.
- If needed, connect your iPhone to iTunes after restarting and let the latest iOS version install.
- Setup your device again from scratch. Don’t restore from a previous backup yet.
Hard resetting can clear any stuck processes causing Error 9 and allows a fresh install of iOS. This fixes issues caused by corrupt files or interrupted updates.
Fix #5: Disable Security or VPN Software
Some third-party security, antivirus or VPN software can block access between iTunes and your iPhone, leading to Error 9.
To rule this out:
- Temporarily disable any security or VPN software on your computer.
- Check that iTunes recognizes your iPhone when connected.
- Try syncing or updating your iPhone. Error 9 should no longer appear.
- Re-enable security software afterwards. Ensure iPhone syncing access is allowed if Error 9 persists.
Fix #6: Update iOS Software and iTunes
As mentioned earlier, Error 9 often indicates incompatible or outdated software versions between your iPhone and iTunes.
Always keep both up-to-date to avoid issues:
- On your iPhone, install the latest iOS updates via Settings > General > Software Update.
- In iTunes on your computer, check for new updates under the Help menu.
- Sync your iPhone to transfer any available iOS updates from your computer.
Staying current with the latest iOS and iTunes versions prevents many causes of Error 9 during syncing, updating and restoring.
Fix #7: Remove Recently Installed Apps
New apps you’ve downloaded recently, especially unauthorized third-party apps, can sometimes trigger iPhone Error 9.
If you started seeing Error 9 after installing new apps from outside the App Store:
- Go to Settings > General on your iPhone.
- Under Profiles or Device Management, delete any untrusted developer profiles.
- Remove any new or unrecognized apps.
- Try syncing your iPhone again. Error 9 should disappear.
Fix #8: Check for Hardware Damage
In some cases, Error 9 may indicate a hardware problem with your iPhone rather than a software issue.
Things to inspect for damage:
- Charging port: Lint/debris inside Lightning port can disrupt connection.
- LCD screen: If damaged/unresponsive, data can’t sync properly to computer.
- Logic board: Controls iPhone functions; failures can cause Error 9.
- Battery: Damaged or swollen battery can randomly crash iPhone.
- Headphone jack: Moisture or dust inside jack may affect syncing over USB.
If no damage is visible, contact Apple Support to run diagnostics and check iPhone’s hardware for faults causing Error 9. Hardware repairs may be needed.
Advanced Fix: Use iOS Repair Software
For advanced iPhone Error 9 fixes, specialized iOS repair software like Tenorshare ReiBoot is highly effective.
ReiBoot can fix Error 9 without erasing your data, as well as resolve 150+ other iOS issues like recovery mode, white Apple logo, black screen, etc.
Here’s how to use ReiBoot to fix Error 9:

- Download and install ReiBoot on your Windows or Mac computer.
- Connect your iPhone to the computer via USB cable.
- Launch ReiBoot and click “Start“. Select your iPhone model.
- Click “Download” to get the latest firmware for your device.
- Once firmware is downloaded, click “Fix Now” to repair your iPhone.
ReiBoot will safely repair Error 9, iTunes error 3004, iTunes error 27, iTunes error 7, iTunes error 9006, and many more by re-installing iOS without data loss. Your iPhone will restart normally once the fix is complete!
For tricky iPhone issues, ReiBoot is an essential tool to have in your toolkit.
Key Takeaways and Summary of Fixes
To recap, here are the key takeaways from this guide on resolving Error 9:
- Update to the latest iOS and iTunes versions. Keep them current!
- Use a proper Apple Lightning cable and USB port. Change cables if needed.
- Put iPhone into Recovery Mode to restore and reinstall iOS. Back up data first!
- Hard reset your iPhone to clear corrupt files. Set up as new after restarting.
- Remove any unauthorized or new apps recently installed.
- Disable security software that blocks iPhone-iTunes access.
- Check iPhone hardware for damage like cracked screen or bad battery.
- For tough Error 9 cases, use advanced repair software like ReiBoot.
Persisting Error 9 issues may require contacting Apple Support for further diagnostics and repair options.
I hope these comprehensive tips help you get your iPhone up and running fast when Error 9 strikes! Let me know in the comments if you have any other fixes I should add to this guide.
Frequently Asked Questions About iPhone Error 9
Here are answers to some common questions about iPhone Error 9:
Q: Why does my iPhone get stuck on the Apple logo with Error 9?
A: An Apple logo that won’t go away usually means your iPhone is stuck during startup and can’t finish booting up. Error 9 points to issues like corrupt system files, incomplete iOS updates or hardware problems.
Q: How can I fix Error 9 without losing my data?
A: The best way is using advanced repair software like ReiBoot – it can safely fix Error 9 without erasing your files or data. Recovery Mode also works but will wipe your iPhone.
Q: I tried Recovery Mode but Error 9 still appears. What next?
A: If the standard Recovery Mode fix doesn’t resolve Error 9, try a hard reset, update your software, remove any unauthorized apps added recently, or scan for hardware damage.
Q: Does Error 9 permanently damage my iPhone?
A: No – in most cases Error 9 does not cause permanent damage. It’s typically a software issue that can be fixed by updating iOS, restoring your iPhone or using repair tools like ReiBoot.
Q: Why does my iPhone show error code 9006 in iTunes?
A: Error 9006 specifically indicates an issue with the firmware installation between your iPhone and iTunes. Updating both to the newest versions usually resolves this code.
Q: How do I backup my iPhone before fixing Error 9?
A: To backup your device before fixing Error 9, connect to iTunes and create a manual backup. You can also use iCloud backups or apps like iMazing for cloud backups.
Q: Can third-party lightning cables cause Error 9?
A: Yes – cheap or faulty Lightning cables that are not MFi-certified by Apple often cause connectivity issues and Error 9. Always use authentic Apple cables.
Q: What should I do if nothing fixes the Error 9 on my iPhone?
A: For persistent Error 9 issues, contact Apple Support directly. They can run diagnostics, suggest next steps or set up further hardware repair if needed.
In Conclusion
Error 9 can certainly be annoying and disruptive when it strikes your iPhone. But in most cases it can be resolved quickly using the fixes in this guide.
The key steps are updating your software, changing cables, resetting the device and removing any new apps installed right before the issue started. For challenging cases, advanced tools like ReiBoot offer a simple one-click repair.
Hopefully these tips will help you get your iPhone back up and running smoothly when Error 9 rears its head again! Let me know if you have any other suggestions for fixing this pesky error code.


