
Many of you might have come across a situation where the VAC was unable to verify your game session, and this would have led to the failure of the matchmaking while playing CS: GO.
This is a frequent error that many people face, and it gets very annoying after a point. Not being able to join the matchmaking terminates the entire session, and you have to start from the beginning.

However, you don’t need to worry anymore as it is to redressal this issue only that we present this article to you.
Understanding VAC
What is VAC?
Valve Anti-Cheat, commonly abbreviated as VAC, is a software component designed by Valve Corporation. The primary objective? To prevent cheaters from spoiling the fun in multiplayer Steam games. The premise is simple, but like anything to do with technology, things can sometimes go awry.
How does VAC work?
VAC runs in the background while you play, scanning your system for any signs of cheat software. It’s kind of like the security guard of the gaming world, always on the lookout for troublemakers. However, it’s not perfect and can sometimes mistake legitimate actions for cheating attempts.
The Dreaded Error: VAC Was Unable to Verify Your Game Session
What does this error mean?
The error “VAC Was Unable to Verify Your Game Session” means that VAC was unable to verify the integrity of your game session, often because it found some discrepancy in your installation. It’s not accusing you of cheating, but it does stop you from joining multiplayer games until the issue is resolved.
What triggers this error?
There are various reasons why VAC might be unable to verify your game session. It could be due to corrupted game files, an outdated operating system, or interference from other software on your system. It’s like trying to get into a fancy party but being turned away because your suit doesn’t meet the dress code.
We will be introducing the best fixes to you for solving this error in no time and get back to playing your favorite game.
Method 1: Restart the Steam Client to Fix ‘VAC Was Unable to Verify Your Game Session’
Many times, the error is a result of the files of the Steam Client getting corrupted. The issue can thereby be fixed by restarting the Steam Client. To do that, just follow below simple steps:
1. You start the method on the Steam Client app that is already open. On the left side of the screen at the top, you will see the Steam tab. Hit a click on it. In the list that emerges, hit the option of Exit.

2. Now, launch the Steam Client once again.
3. Click over the option of Steam on the top-left side once again. This time, find the option of Go Offline in the list and hit it.

4. Now, click over the option of Restart in Offline Mode.

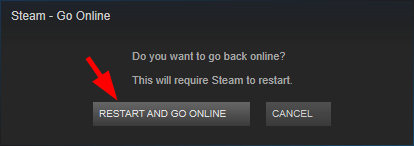
5. Hit the Steam tab and then select the option of Go Online.

6. In the next window, click the option of Restart and Go Online.
Now go back and try running the game once again. The ‘VAC was unable to verify your game session’ error may have gotten resolved by now.
PS: Let’s figure out how to make money on Steam.
Method 2: Fix the Steam Client
As we were talking about the corruption of the Steam Client files that lead to the crashing of the CS: GO error, the issue can be rectified by one more method which is repairing the Steam Client. Follow the steps that we give below to be able to do so:
1. You start the method on the Steam Client app that is already open. On the left side of the screen at the top, you will see the tab Steam. Hit a click on it. In the list that emerges, hit the option of Exit.
2. Hit the button Start that is on the left side of the Desktop at the bottom.

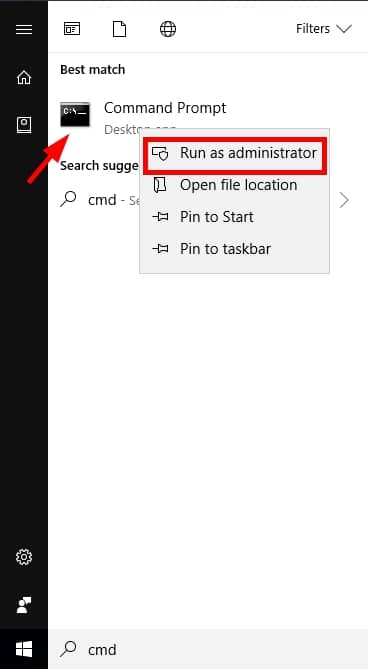
3. In the search bar, enter cmd. From the options that emerge, click over the option of Command Prompt. Hit a right-click over the name and then select the option Run as administrator.
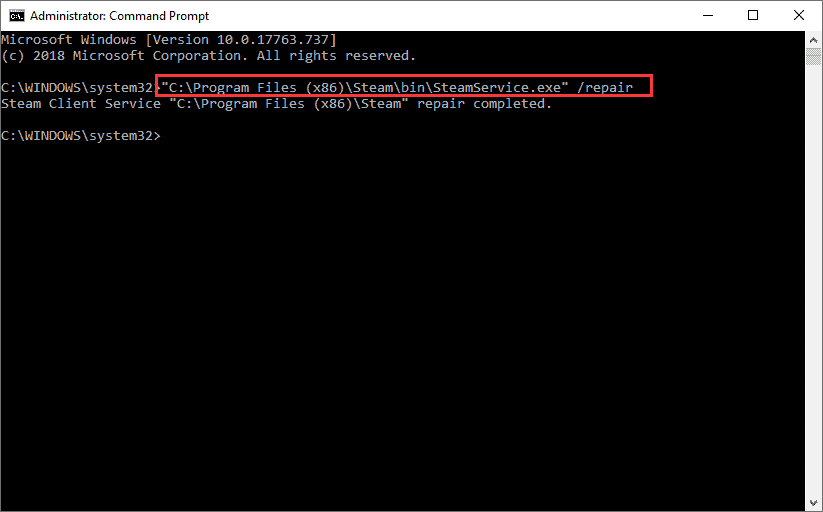
4. In the Command Prompt box that will emerge at this stage, you need to enter the following command:
"C:\Program Files (x86)\Steam\bin\SteamService.exe" /repairNote: The part ‘C:\Program Files (x86)\Steam‘ refers to the location where the files of the Steam Client are stored. If the Steam Client on your PC is located somewhere else, then you will need to enter that location.
Hit the button Enter on the keyboard.
5. Restart the PC at last.
Now launch the Steam Client app once again. Try to open your game.
Method 3: Verify the Files of the Game
The particular files related to the CS: GO game are also susceptible to errors. Any issue with the integrity of these files may also be a reason why VAC was unable to verify your game session.
In this case, running a check over the game files can be a viable solution, and following the steps below will help you do that:
1. On the main screen of the Steam Client app, find the option of the Library and click on it.

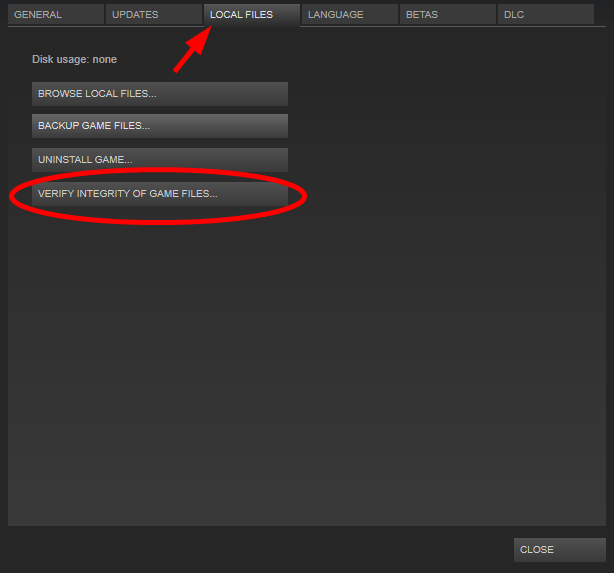
2. In the list of games displayed in the Library window, hit a right-click on the option of your game which is CS: GO in this case. From the drop-down, select the option of Properties.

3. Hit on the tab Local Files. In the list of options, select the one named Verify Integrity of game files.
4. It will take some time for the process to finish. Wait until it gets done, and then hit the button Close.

Go back and launch the Steam Client app once again. Try to open your game.
Method 4: Fully Re-install the Game
If changing the system settings or restarting the Steam app didn’t work out, then there is one more method that you can try. The error might get resolved by re-installing the game altogether.
If it gets successful, then this would be the best method that would save you a lot of time and effort. Let’s see how to carry it out:
1. On the main screen of the Steam Client app, find the option of the Library and click on it.
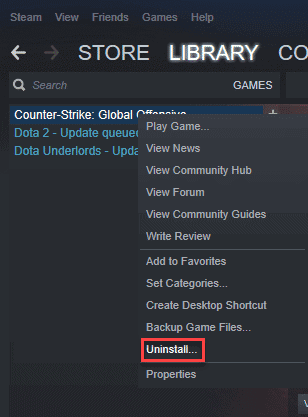
2. In the list of games displayed in the Library window, hit a right-click on the option of your game which is Counter-Strike: Global Offensive in this case. From the drop-down, select the option of Uninstall.
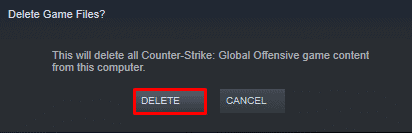
3. In the windowpane that emerges next, click the option of Delete. Confirm the next pop-up by clicking on Delete once again.
4. Now, you will have to install the game once again. Download the game from any trusted website.
Method 5: Update the System Drivers
If the game is running on the wrong or faulty drivers, then it can also lead to a situation where you will see that VAC was unable to verify your game session. Updating the system drivers can help in this case if you want to remove the error once and for all.
However, driver updating can be a hectic and time taking process. If you are not in the mood to go through the process or don’t have the required skills to do so, then don’t worry; we have got you covered.
Driver Easy
This is the software that we are going to introduce to you that will help you update the drivers in a jiffy. Driver Easy facilitates the automatic recognition of the system, diagnoses the problematic drivers, and then finds out the right drivers for the system.
There are two versions of the Driver Easy software- Free and Pro. Both of them can be used to carry out the updating of the system drivers to remove the VAC that was unable to verify your game session error.
However, the Pro version gives you the advantage of getting the entire process done in just two clicks. It also includes benefits like full customer assistance and a money refund guarantee of 30 days.
Below is the Method of Using Driver Easy:
1. Download the software on the PC and install it properly.
2. Launch the app & hit the button Scan Now on the main screen itself. Driver Easy will get to work immediately and scan the PC for the problematic drivers.

3. Once the scan is completed, the software will list all the faulty drivers on the screen. Now, you have to hit the button Update, which will be in front of the device options. This will start the downloading of the right drivers for them.
Note: The Pro version of Driver Easy has the option of Update All, which can let you update every problematic driver on the PC automatically and in one go. You won’t be required to select the devices individually.

If you want to update the system drivers manually, then there is a method for that too. Please follow below simple guide:
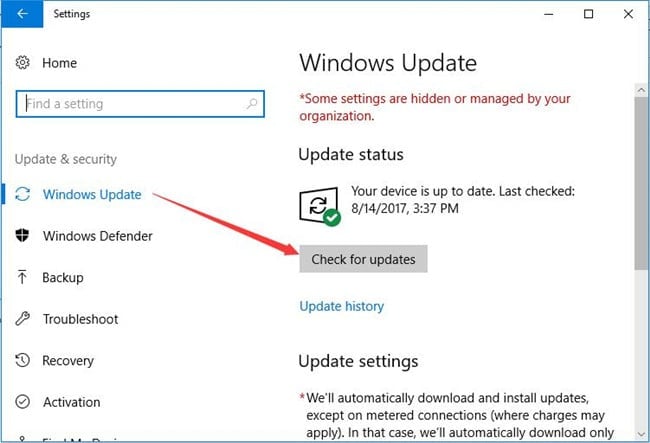
1. Open the PC Settings. Hit the tab Update and Security.
2. Click over the option of Check Updates. Wait till the process ends, and then move ahead.
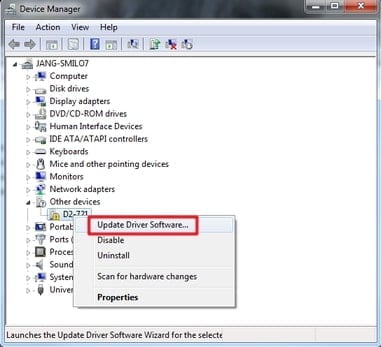
3. Go back and launch the Control Panel. Here, click the option of Hardware and Sound. Inside the tab, select the Device Manager tab.
4. All the faulty drivers will be listed and can be identified by a yellow sign around them. On the individual options, hit a right-click and select the option of Update driver software.
You would also need to mandatorily check all the other drivers, third-party webcams, or audio drivers too.
Frequently Asked Questions
Q1: Can I get banned for the VAC verification error?
Absolutely not! The “VAC Was Unable to Verify Your Game Session” error isn’t a ban. It’s just an interruption to your gaming caused by a temporary hiccup.
Q2: Is this error exclusive to a specific game?
No, this error can occur with any multiplayer game on Steam that uses VAC.
Q3: How long does the VAC verification error last?
The duration of this error can vary depending on its cause. In many cases, the error is resolved after applying some of the fixes mentioned in this article.
Q4: Is it safe to ignore this error message?
Ignoring this error means you’ll be unable to join multiplayer games, which can be quite a bummer if you’re a fan of online gaming. It’s better to address the issue head-on.
Q5: Can outdated drivers cause this error?
Yes, outdated drivers can potentially cause this error. It’s always a good idea to keep your drivers up to date.
Q6: Will changing my Steam account settings fix this issue?
Changing your account settings isn’t likely to resolve this issue as it’s typically related to local system files or software.
Conclusion
The “VAC Was Unable to Verify Your Game Session” error might seem like a thorn in your side, but with the help of this guide, it doesn’t have to be. By understanding its causes and applying these troubleshooting steps, you can get back to your gaming adventures.
Remember, a smooth sea never made a skilled sailor. Every problem encountered and solved is a lesson learned. And that’s what makes us experts, not just in gaming, but in any field we choose to explore. So, let’s continue our journey, troubleshooting one error at a time, leveling up with every challenge.


