
Losing data stored on your SIM card can be frustrating and upsetting. Important contacts, messages, photos, and other personal information may seem gone forever when deleted or your SIM card is damaged.
Thankfully, with the right tools and techniques, SIM card data recovery is often possible. In this comprehensive guide, we’ll walk you through everything you need to know to get back lost or deleted data from your SIM card.
Overview of SIM Cards
To understand SIM card data recovery, let’s first go over what exactly a SIM card is and does:
- SIM stands for Subscriber Identity Module.
- A SIM card is a small, removable chip that allows smartphones to connect to cellular networks.
- SIM cards store your account information to identify you to the network.
- In addition to network data, SIM cards can also store contacts, messages, photos, videos, and other files.
- SIM cards slide into a tray or slot in smartphones and can be removed or swapped between devices.
- Common SIM card sizes are standard, micro, and nano to fit various smartphones.
- Older SIM cards only stored network data. Newer cards have more storage for files.
- Contacts and media used to be stored on SIM cards more often. Now most data resides in internal phone storage.
So in summary, SIM cards contain both carrier account data to connect your phone number and additional storage that can optionally save contacts, messages, media, and other personal information.
Why Perform SIM Card Data Recovery?
Here are some common reasons you may need to recover data from a SIM card:
- Accidental deletion – Contacts, messages, or files were deleted from the SIM card when they shouldn’t have been.
- SIM card damage – The SIM card itself is corrupted or physically damaged, leading to data loss.
- Phone issues – Problems with the smartphone damaged SIM card data.
- Device switch – Wanting to transfer data from an old SIM card to a new phone.
- Backup retrieval – Needing to extract files from a SIM card backup.
- Forensic investigation – Recovering data for legal purposes from a SIM card.
So if you’ve lost access to important SIM card data like contacts and text messages for any reason, specialized data recovery solutions exist to help get it back.
Part 1: SIM Card Data Recovery on iPhone
For iPhone users, your best option for reliable SIM card data recovery is a program called dr.fone – Data Recovery. This powerful software can retrieve lost iOS data from various sources.
We’ll cover how to recover SIM card data on iPhone using dr.fone in three different ways:
- Directly from the iPhone
- From an iTunes backup
- From an iCloud backup
Using dr.fone – Data Recovery
Before jumping into the specific recovery methods, let’s highlight some key features that make dr.fone the top choice for iOS SIM card data recovery:
- Flexible recovery options – Retrieve data directly from iPhone, or from iTunes or iCloud backups.
- Wide file support – Recover messages, contacts, photos, video, and many other file types.
- Safe and non-destructive – Won’t overwrite existing iPhone data or backups.
- Selective restore – Choose which files to recover to avoid restoring unnecessary data.
- Easy to use – Simple interface and process ideal for beginners.
- Technical support – Help documentation and customer service if needed.
With dr.fone, iOS SIM card data recovery is straightforward even for less tech-savvy users. Follow the steps below for each recovery method.
1. Recover Data Directly from iPhone
This method restores SIM card data still present on your iPhone. It won’t retrieve deleted data that’s been overwritten.
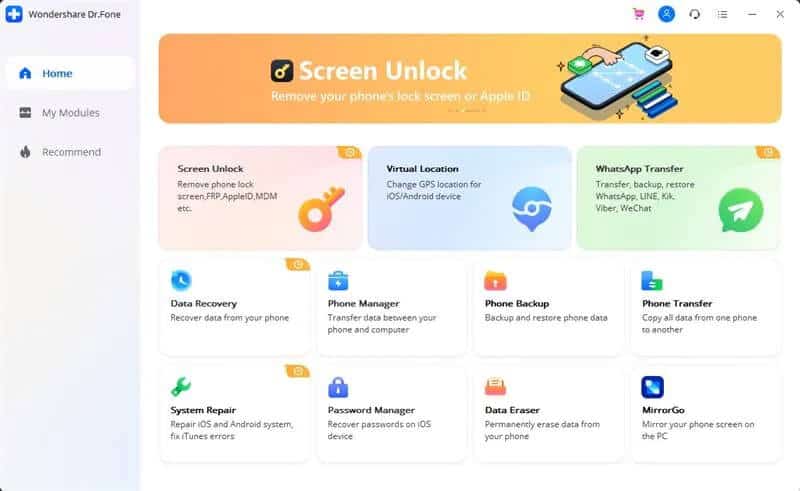
Step 1: Download and install dr.fone on your computer. Launch the program.
Step 2: Connect your iPhone to the computer using a Lightning cable.
Step 3: In dr.fone, click “Data Recovery” > “Recover from iOS Device“. Select the types of data to scan or choose “Scan for Lost Data“.
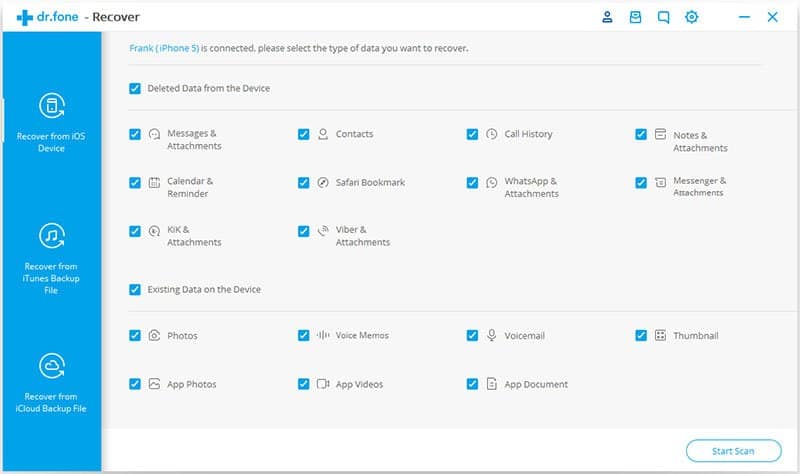
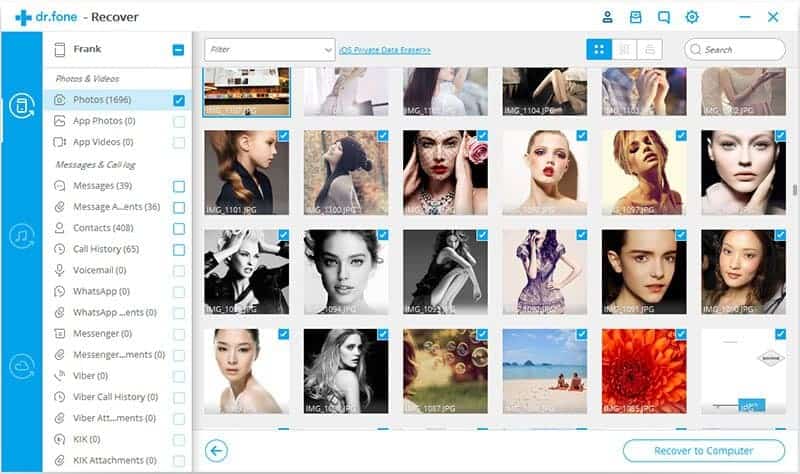
Step 4: dr.fone will scan your device. Preview and select the files to recover.

Step 5: Click “Recover” to restore the data directly back to your iPhone.
2. Recover Data from iTunes Backup
If you’ve backed up your iPhone to iTunes on a computer, you can extract SIM card data from that backup file.
Step 1: Install dr.fone and launch the app. Connect your iPhone.
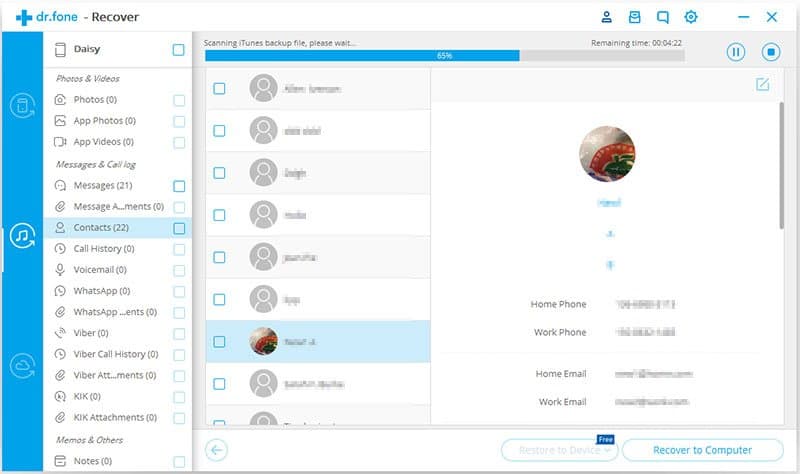
Step 2: Click “Data Recovery” > “Recover from iTunes Backup File”. Select the backup.
Step 3: dr.fone scans the backup. Choose which data to restore.
Step 4: Click “Recover” to save the files to your computer. Transfer them back to your iPhone.

3. Retrieve Data from iCloud Backup
For iCloud users, you can recover data from an iCloud backup without erasing iPhone.
Step 1: Open dr.fone on your computer. Click “Data Recovery” > “Recover from iCloud Backup“.
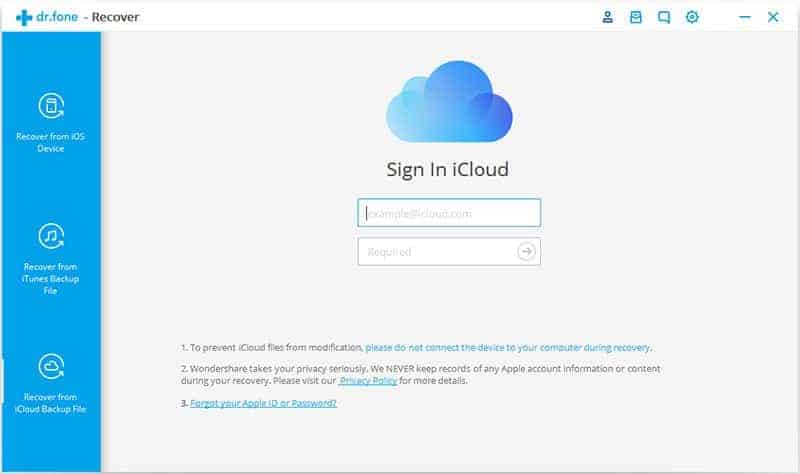
Step 2: Sign into iCloud and select the backup to scan. Pick data types to download.
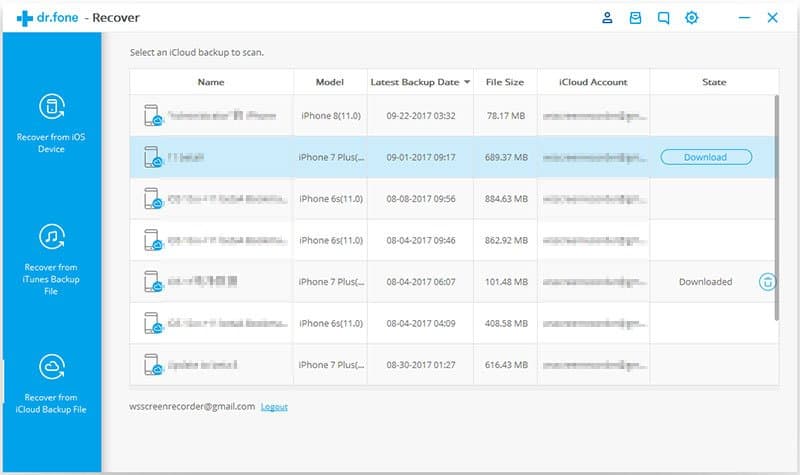
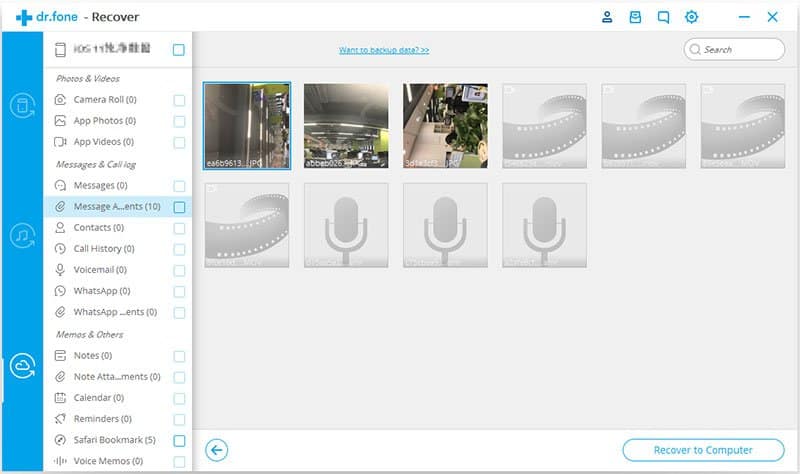
Step 3: dr.fone downloads the backup and scans it. Select desired files.
Step 4: Click “Recover” and export data to your computer. Sync to iPhone.
As you can see, dr.fone makes SIM card data recovery straightforward by offering multiple backup options. Keep reading for Android solutions.
Part 2: SIM Card Data Recovery on Android
For Android devices, SIM card data recovery follows a similar process using dedicated recovery software. In this section, we’ll cover recouping lost SIM card files using:
- Directly from an Android device
- From a Google account backup
The software we recommend is called FoneLab for Android. It works similar to dr.fone for seamless Android SIM card data recovery.
Using FoneLab for Android
Just like dr.fone for iPhones, FoneLab for Android makes it easy to recover contacts, messages, media, and documents off Android SIM cards. Key features include:
- Multiple recovery routes – Directly from device or Google backup.
- Broad file support– Get back messages, calls, contacts, photos, audio, video, documents, and more.
- Selective restore – Choose only the data you want to avoid overwriting phone files.
- Deleted data – Recover even deleted files that aren’t completely overwritten.
- User-friendly – Simplified process and interface for beginners.
- Extra tools – Backup manager and phone-to-phone transfer options.
Let’s go through the steps to restore SIM card data from an Android device and Google backup.
1. Direct Recovery from Android Device
This method works if the files are still present on the Android device and storage.
Step 1: Install and open FoneLab on your computer. Connect Android phone with USB cable.
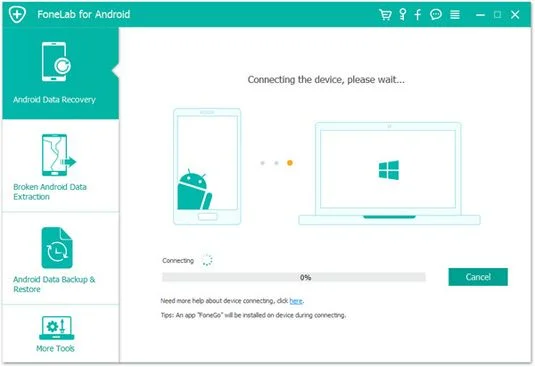
Step 2: Click “Android Data Recovery”. Allow USB debugging if prompted.

Step 3: Select file types to scan or tick “Select All”. Click “Next”.

Step 4: FoneLab scans device and shows recoverable files. Choose items to restore.
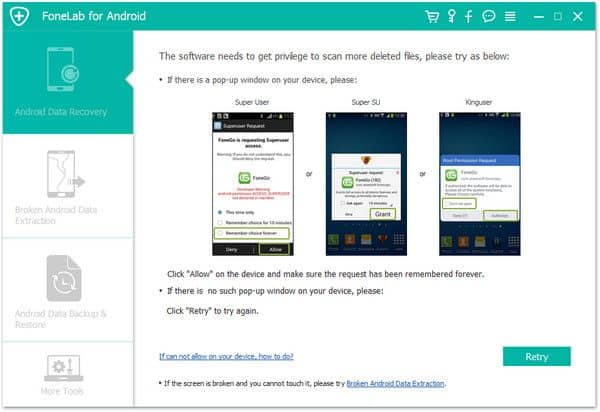
Step 5: Click “Recover” to restore selected data back to your Android phone.

2. Retrieve Data from Google Backup
If your data was backed up to your Google account, you can recover it from there.
Step 1: Install FoneLab. Click “Android Data Recovery” > “Recover from Google Account”.
Step 2: Sign into Google and pick backup to scan. Select data types.
Step 3: FoneLab downloads and scans the backup, then shows recoverable files.
Step 4: Select the data to extract and click “Recover”. Export to your computer.
Step 5: Transfer the recovered files back to your Android if desired.
As you can see, FoneLab makes Android SIM card data recovery easy with intuitive backup options.
Key Takeaways for SIM Card Data Recovery
To wrap up this guide, let’s review the key tips for recovering contacts, messages, media, and other data from your SIM card when they are lost or deleted:
- Use software like dr.fone or FoneLab for reliable, safe SIM card data recovery.
- On iPhone, recover data directly from the device, iTunes, or iCloud.
- For Android, restore files directly or extract them from a Google account backup.
- Preview files before recovery to avoid overwriting existing data.
- Selectively choose the exact data to recover instead of full backups.
- On iOS, recover to computer then sync back to iPhone to avoid overwriting.
- Directly recover files back to Android as needed by selecting Restore to Device.
- If phone storage is undamaged, directly recovering data has the best success rate.
- Back up SIM card contacts, messages, photos and other data regularly as a precaution.
Follow these tips when needed to get back missing SIM card data. Next we’ll cover some frequently asked questions.
FAQs About SIM Card Data Recovery
Here are answers to some common questions about recovering lost and deleted data from SIM cards:
Can I recover deleted text messages from my SIM card?
Yes, you can recover deleted text messages from a SIM card using dr.fone or FoneLab as long as the data isn’t overwritten by new information.
Are there free SIM card recovery apps?
Some free software or apps may be available but typically offer limited functionality. Paid solutions like dr.fone and FoneLab provide the full suite of professional data recovery tools.
How do I recover contacts from a damaged SIM card?
If the SIM card is physically damaged, you may need to use a professional SIM card repair service. They can often extract contacts and data from corrupted SIM cards.
Do I need to unlock my iPhone to recover SIM card data?
No, you can recover SIM card data from an iPhone regardless of it being locked or unlocked. The data recovery software accesses files directly.
What if my SIM card is lost or stolen?
Contact your carrier immediately to suspend service and get a new SIM card. Then use one of the backup recovery methods mentioned to restore your data.
Can I recover data after factory resetting my phone?
If you reset your smartphone to factory default settings, recovering data is still possible unless it gets overwritten by new data. So recover it ASAP.
In Summary
Losing personal contacts, text messages, media files, and other SIM card data can certainly be stressful. Thankfully specialized software makes it possible to recover deleted or lost SIM card files in many cases. Options like dr.fone and FoneLab make it easy to retrieve data directly from an iPhone or Android, or extract it from iTunes, iCloud, or Google backups.
We hope this guide gave you a thorough overview of how to properly recover contacts, messages, photos, videos, and any other data from your SIM storage when needed. Just follow our tips to safely restore your lost files. Let us know if you have any other SIM card data recovery questions!


