There are many computer applications developed based on Java. When users run these applications, they are supposed to run smoothly.
However, in some instances, errors can pop up and terminate the launch of the respective software. This is usually happening by displaying the error message that starts with ‘could not create the Java virtual machine …’.
If you see this message, the next thing you will experience is that the Java program is stopped. Well, have you ever experienced this error ‘could not create the Java virtual machine …’ error? If so, this article explains the fixes to it. So, read on.

What Causes the ‘Could Not Create The Java Virtual Machine’ Error?
There are several causes behind this issue. Mentioned below are some of those reasons.
- If Java is invoked with the wrong arguments
Or if you use unstable software (be it a game or any other app), this issue can occur. - If Java global maximum heap memory is not high enough
This is among the most common causes for sure. In this case, you will have to allocate more memory to resolve the issue. - If Java executable file and application is not granted administrative privileges
To solve this, you should provide administrative privileges.
Besides, if you are bothered by the issue of could not find or load the main class, click to fix it now.
How to Fix the ‘Could not create the Java virtual machine’ Error?
As emphasized in the first paragraph of this article, we are going to explain how to fix this error. In fact, there are multiple solutions to this error, so you should pick the most appropriate one for you. Let’s read on.
Fix 01: Configure a New System Variable
Configuring a new system variable for Java is our first solution to this error. The ‘Could not create the Java virtual machine’ error actually appear when there is not enough memory for it.
In other words, Java requires a substantial amount of memory, and when there is not enough memory, it stops. That means some of the machines that have larger memory capacity experience this issue rarer compared to other machines.
Some of the users have found a solution to this issue simply by expanding the RAM allocated to Java.
Well, to allocate more memory to Java, you may try the following steps and get it done. We use this option as the first method because it is a very easy process.
Steps to Configure a New System Variable
- As the first step, you should open the ‘Run’ command on your computer. To do this, there are a couple of ways. You can simultaneously hit the Window key and the ‘R’ key on the keyboard to get the ‘Run’ dialog box opened. If not, you can hit the Windows key and type ‘Run‘ in the search box, and select the ‘Run’ option.
- No matter which method you select, just go to ‘Run.’ Once the ‘Run‘ dialog box is opened, you will see a search bar as well. In this search bar, enter the text’ sysdm.cpl‘. Then, press the button labeled ‘OK.’ You will now see a different window. This Window will comprise the title ‘System Properties.’

- On this Window called ‘System Properties,’ you should select the ‘Advanced‘ tab. Under this option, you will find a button called ‘Environment Variables.’ This will lead you to another window.
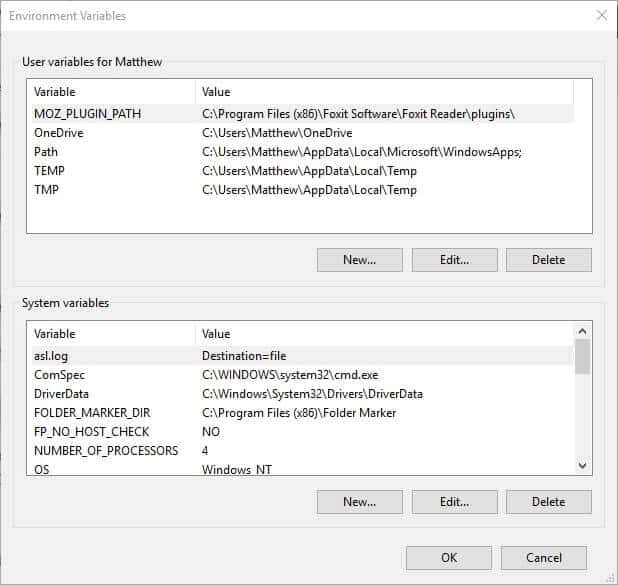
- Click on the option ‘New,‘ located under ‘System variables.’
- Now, you should enter ‘_JAVA_OPTIONS.’ This should be entered inside the Variable name text box.

- Afterward, you should enter ‘_Xmx512M‘ within the Variable value text box. Well, this option will increase RAM allocation by 512 megabytes.

- To complete the process, you should click the ‘OK‘ button.
- You can also press the ‘OK‘ button on the ‘Environmental Windows.’
- That’s it, and 512MB RAM will be allocated.
Fix 02: Make ‘Run’ as an Administrator Option for Java
If the previous option doesn’t work for you, you will have to try a different option. If it doesn’t work, the error might be something else.
In fact, ‘Could not create the Java virtual machine …’ can occur due to insufficient admin rights to Java. Using Windows 10, you can fix the issue using the following steps.
- In Windows 10, you should open Cortana. To do this, you should hit Windows Key with the ‘Q’ key on the keyboard.
- Now, you will see a search box appearing. In this box, enter ‘Java.’
- Then, you will be able to see the ‘Java‘ option. Right-click on this option and then select the option called ‘Open File Location.’
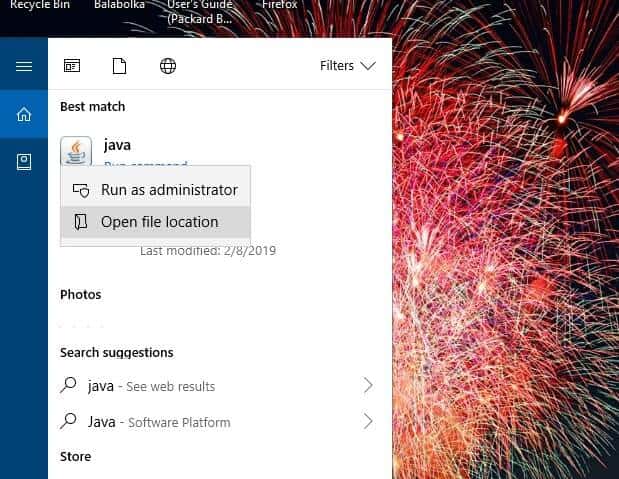
- This option will open the folder of Java in the File Explorer window.
- You can now go to the java.exe file and then right-click on it. You will then be able to select the ‘Properties‘ option.

- Then select the tab labeled ‘Compatibility.’
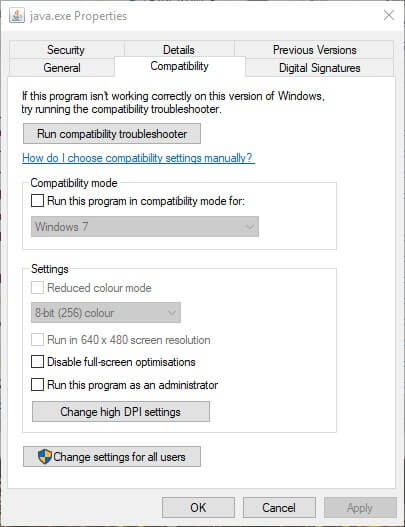
- After selecting the ‘Compatibility‘ option, you should select ‘Run this program as an administrator.‘
- To complete the process, you should select the option ‘Apply.’
- Click ‘OK‘ so you can finish the process.
Fix 03: Install Java Once Again
If none of the above options have worked so far, the cause of the issue might be something different.
So, as another remedy, you should try reinstalling Java and check if it resolves the issue. After reinstalling Java, you can expect the ‘Could not create the Java virtual machine‘ error to be gone.
So, to get it done, you should first uninstall the existing version of Java. For that, you must go to the control panel of the machine. To access the control panel, there are several options you can consider.
For instance, you can either choose a long way or a shortcut. As we believe, entering the text ‘appwiz.cpl.’ within the ‘Run’ box is the most convenient way.

Steps to Reinstall Java
- Then, in the search box, you should enter ‘Java.’ If not, you can simply scroll down until you find the Java option.
- Now, select the ‘Java’ option and click on ‘Uninstall.’
- You may now click on ‘Yes’ on the confirmation box, which will pop up.
- Now, restart the Windows computer after the installation.
- Open a web browser of your preference and go to the Java download page.
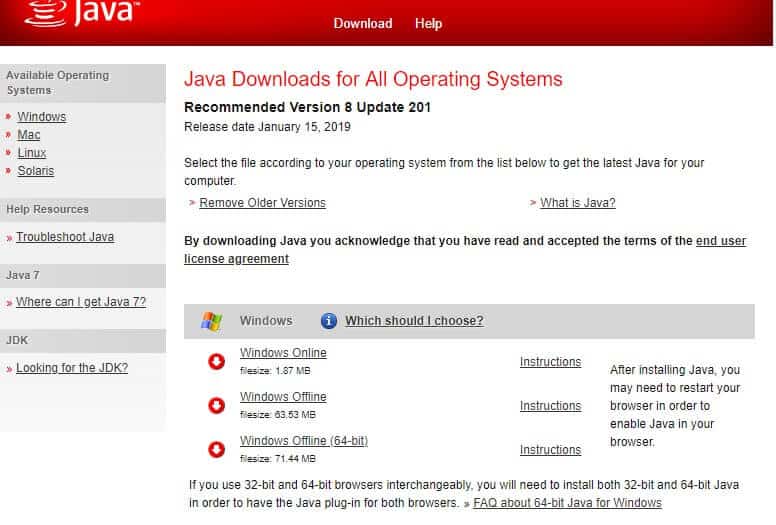
- Make sure you choose the appropriate software version for the operating system running on your computer. For instance, if you have a 32-bit Windows OS, you should choose the 32-bit Java file. However, if the operating system runs on 64-bit, you should choose the 64-bit version accordingly. If you are doubtful about the version, you may try installing both Java files. To do this, you should go to the Windows Offline file.
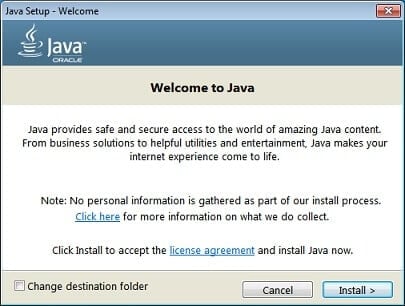
- Whether you have selected the 32-bit version or the 64-bit version, you must now open the Java setup wizard.
- Click on the option labeled ‘Install,’ which appears as a button on this setup wizard you have just launched.
FAQs
FAQ #1: Why am I getting the “Could Not Create The Java Virtual Machine” error?
This error can occur due to various reasons, such as insufficient memory allocation, incompatible Java version, misconfigured JVM parameters, corrupted Java installation, or conflicting environment variables.
FAQ #2: How do I adjust the Java Virtual Machine parameters?
To adjust the Java Virtual Machine parameters, locate the startup script or configuration file used to launch the Java application. Look for the JVM parameters section and modify the desired parameters, such as heap size.
FAQ #3: How do I allocate more memory to the JVM?
To allocate more memory to the JVM, open the startup script or configuration file and locate the parameter “-Xmx” followed by a value representing the maximum heap size. Increase the value to allocate more memory.
FAQ #4: What should I do if reinstalling Java doesn’t fix the issue?
If reinstalling Java doesn’t resolve the error, you can try other solutions such as adjusting JVM parameters, allocating more memory, or troubleshooting with environment variables.
FAQ #5: How do I troubleshoot the error using environment variables?
To troubleshoot the error using environment variables, open the system’s environment variables settings and check for conflicting or incorrect variables related to Java. Modify or remove these variables to align with your Java installation.
Conclusion
That is exactly how to fix the ‘Could not create the Java virtual machine ….’ Issue. This is also known as Java Virtual Machine fatal error.
As we believe, the resolutions we have mentioned above can address this issue for good. Once the issue is fixed, you can run the required Java software without any issues.


