
Life is a symphony, isn’t it? And your AirPods, they are the delicate instruments that deliver the music of life right into your ears. But what happens when your orchestra goes silent, when your AirPods refuse to connect to your Mac?
It’s like a crescendo that abruptly stops, leaving you in deafening silence. But fear not, for this guide will help you troubleshoot and reconnect your AirPods to your Mac, so you can go back to your harmonious existence.
Understanding the Connection: AirPods and Your Mac
The Magic of Bluetooth
Bluetooth technology is the invisible thread that links your AirPods to your Mac. It’s like a secret handshake, an unseen bond that seamlessly ties the two together. But, like any relationship, sometimes there are misunderstandings and disconnects.
Possible Issues with Connection
There could be a plethora of reasons why your AirPods and Mac are having a squabble. The battery could be drained, or the Bluetooth on your Mac could be acting up. The solution could be as simple as a quick fix or might require a deeper dive into your Mac’s settings.
Part 1: Connecting an AirPod to a MacBook Air or MacBook Pro
First of all, let’s see how to connect an AirPod to a MacBook (Air or Pro). In general, the design of the AirPod is very convenient. As per its design, it is supposed to be connected to any Apple device synchronized with iCloud.
However, even Apple devices aren’t perfect and occasional glitches can take place at any time. That means there’s a probability for your AirPod device to malfunction due to one reason or another.
Sometimes, it may not pair automatically as you expect. Therefore, it is worth it to know how to fix this AirPod-related issue. One of the simplest methods you can try to resolve the problem is pairing it manually.
Following are the steps you should follow in order to pair AirPods manually with Macbook.
- First, open the charging case of the AirPods and do it carefully.
- You should then perform a long press on the small button located at the back of the AirPod. Then, you will see that an LED light pops out and blinks.
- Now, on your MacBook, you should switch on the Bluetooth function.
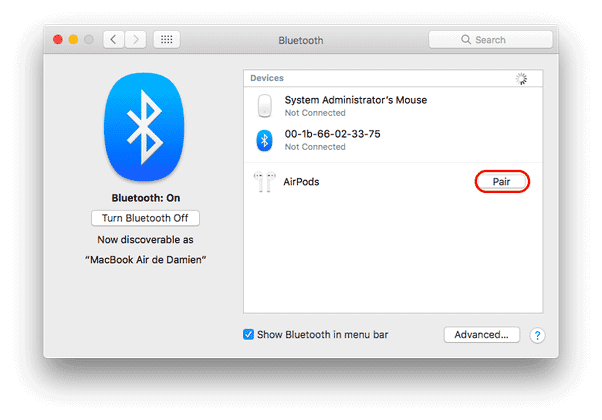
- Go to the Bluetooth icon located at the right-hand side corner of the screen (top). Then, choose the option “Open Bluetooth Preferences.”
- You can now allow your Mac to perform a Bluetooth can so it will detect the nearby AirPod.
- On the Mac you are operating, click on the pair button of the AirPod to complete the process.
Part 2: How to Solve the “AirPods Not Connecting to Mac” Issue?
If the manual pairing doesn’t work for you, you should try the methods we have mentioned below. In fact, we have provided several solutions to this issue so you can select the best method.
Fix 01: Perform an Update on Your Mac to Solve the “AirPods Not Connecting to Mac” Issue
If your Mac doesn’t have Sierra or a newer OS, you cannot expect it to pair with AirPods. So, the first thing you should do if AirPods is not connecting to your Mac is to check its OS.
If the OS is older, you should definitely update it, at least to Sierra. In fact, unsupported macOS is among the most common reasons behind this issue.
In order to get an idea about the macOS available on your computer, you should follow the steps mentioned below.
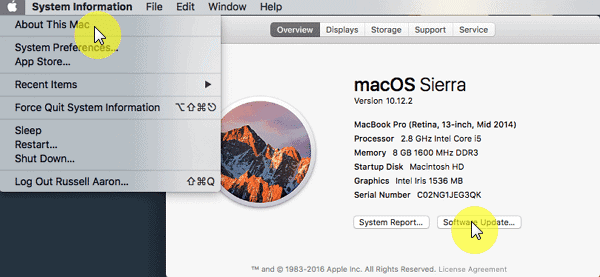
- Go to the Apple logo
- Select the option About This Mac
If the macOS version is older than Sierra, you should hit the “Software Update” button.
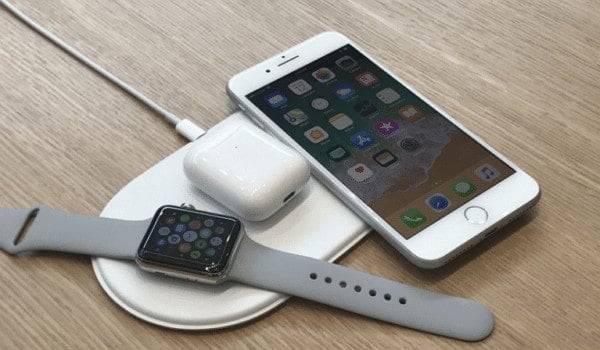
Fix 02: Have the AirPods and Its Charging Case Properly Charged
When it comes to using AirPods, they should be properly charged before you use them. Otherwise, some issues can occur, including bad connections.
To charge the AirPods, you should first charge their charger. In order to get the AirPods charger fully fueled, you can follow the steps mentioned below.
- Make sure that the AirPods are properly placed in the charging case so you can see the status light.
- When it comes to the charging case, plug an original lighting cable into the connector.
- The other end of the lighting cable should be connected either to a wall charger or a USB port.
Now, the charging process will begin.
And let’s figure out how to fix the issues like the iPhone microphone not working.
Fix 03: Reset AirPod-Mac Connectivity
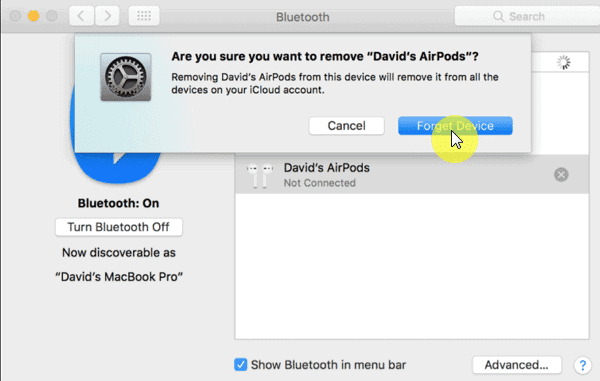
If the previous options don’t do any good for you, it is better to rest AirPod-Mac connectivity (Bluetooth). To reset the connection, you should first forget your AirPods on Mac. Once forgotten on the Mac, the AirPods will be new to it once again.
To connect the device, you should establish a new connection. In other words, you will be pairing your device with a totally new device. In order to perform this option, you will have to follow the steps listed below.
- Go to the tab labeled “System Preferences” on your Mac.
- Select the option “Bluetooth.”
- Tap the Bluetooth option of your AirPods under Mac’s Bluetooth options.
- Now, move the mouse over the AirPods device and tap the “X” tab (in a circular shape).
- When you see a popup, you should select “Forget Device.”
- After a couple of minutes, you should connect AirPods to Mac manually once again.
For most users, this option should work like a breeze.
Fix 04: Select AirPods to Be the Output Device of the Mac
If your Mac does have other output devices connected, they might affect the functionality of the AirPods. If Mac already identifies another device, your AirPods won’t produce any sound. In order to solve this issue, you should follow the steps mentioned below.

- Make sure that you have opened the AirPods charging case and that the device is placed within the range.
- You should now power on your Mac’s Bluetooth connection.
- Under the option “System Preferences,” you should go to the “Sound” option.
- Just select AirPods from the “Sound Output” tab.
This should resolve the issue for most of the users.
Fix 05: Perform a Reset on Your AirPods
If you are yet to be succeeded, you should try resetting the AirPods. In fact, resetting can resolve most of the connectivity issues associated with AirPods. In order to reset the AirPods, you should follow the simple steps mentioned below.

- Press and hold the setup button in the AirPods charging case (which is located on the backside).
- You will see that the status light is flickering in an amber color. Then, the light will flicker in white color. When you see this white flickering, release the button so the device will be reset.
Fix 06: When All Else Fails: Additional Help
Contacting Apple Support
Apple Support is like a guiding star, always there to help when you’re lost. Don’t hesitate to reach out to them if your symphony remains muted. Their expertise could shine the light on the issue and bring your AirPods and Mac back together.
Visiting an Apple Store
Sometimes, it’s best to let the maestros handle the problem. Visit an Apple Store if your AirPods and Mac refuse to mend their broken bond. The geniuses there can tune up your devices and restore the music to your life.
Part 3: [BONUS TIP] Use Professional Software to Solve “AirPods Not Connecting to Mac” Issue
In most cases, the issue we’re trying to resolve has a link to some error in iOS. So, if none of the above options haven’t worked for you so far, try repairing the iOS. Due to that, you should use a professional software called Tenorshare ReiBoot.
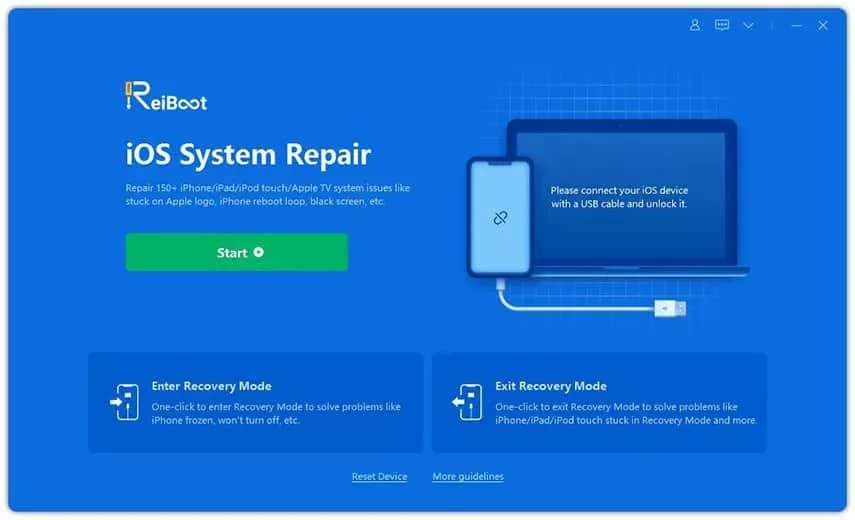
Tenorshare ReiBoot is special software dedicated to resolving iOS issues, including spatial sound not working. It can fix a range of different issues associated with your iOS system.
Here Are Some of the Key Features Included in ReiBoot.
- It works with pretty much all iOS devices ranging from 6 to iPhone 14.
- Tenorshare ReiBoot doesn’t misuse or retain any of your data.
- It can recover lost or intentionally deleted data from your iOS devices.
- It has three different recovery modes to be compatible with different situations.
Well, we hope these methods will surely fix the “AirPods not connecting to mac” issue. These methods might come in handy if you ever face a connectivity issue with your AirPods.
Also, you can click to fix your iPhone boot loop issue.
FAQs
1. Why won’t my AirPods connect to my Mac?
The reasons could be many – drained battery, Bluetooth issues, or outdated software. This guide will help you identify and fix the issue.
2. How do I reset my AirPods?
To reset your AirPods, place them in their charging case, close the lid, and wait for 30 seconds. Then, press and hold the setup button on the case until the status light flashes amber.
3. How can I check if my Mac’s software is up to date?
Go to the Apple menu, click on “System Preferences,” and then click on “Software Update.” Follow any prompts if there’s an update available.
4. How do I ensure my AirPods are selected as the audio output on my Mac?
Go to “System Preferences” on your Mac, select “Sound,” and then click on the “Output” tab. Make sure your AirPods are selected as the output device.
5. What should I do if none of the troubleshooting steps work?
Contact Apple Support or visit your local Apple Store for assistance. They will help you resolve the issue and reconnect your AirPods to your Mac.
Conclusion
Your AirPods are more than just a pair of headphones; they are an extension of your soul, an outlet to the world of music, podcasts, and endless conversations. When they fail to connect to your Mac, it can feel like a part of you is missing.
But with this guide, you now have the tools to troubleshoot and restore your AirPods’ connection to your Mac, bringing harmony back to your life.


