
One of the unique aspects of Twitch is that you can learn how to create clips on Twitch. Clipping is a feature where you can capture and share certain video moments with your friends.
Additionally, you also have the choice to edit these clips and share them on your social media pages. Apart from these, there are many things that you can do with these clips.
Twitch clips are often used by viewers and streamers to share, watch, and relive those moments again and again. If you do not have any video editing experience, clipping a video on Twitch is as easy as cutting the best moments. Overall, this is how to create a clip on Twitch.
Here, we will talk about various ways to help you learn how to create clips on Twitch for various types of devices like computers, laptops, mobile devices, etc.
Apart from the basics, we will also cover some common FAQs related to this topic.
Part 1. How to Create Clip on Twitch for Your Windows / macOS?
Here are the steps that can help you learn how to create a clip on Twitch for your computer (Windows/macOS) or laptop:
Step 1: Find The Twitch Video You Want To Create Clip
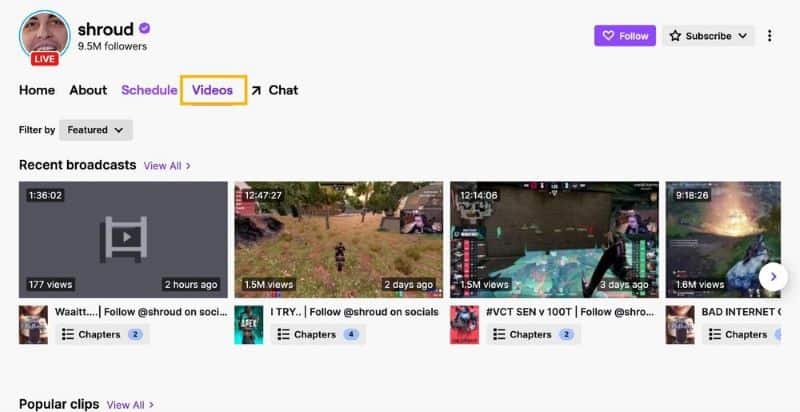
The first step in learning how to create a clip on Twitch is visiting Twitch on your computer browser.
Once done, you need to log into your account and select the video you want to clip. You can also use the drop-down menu to browse through highlights, broadcasts, and much more.
Step 2: Opening The Clip Feature
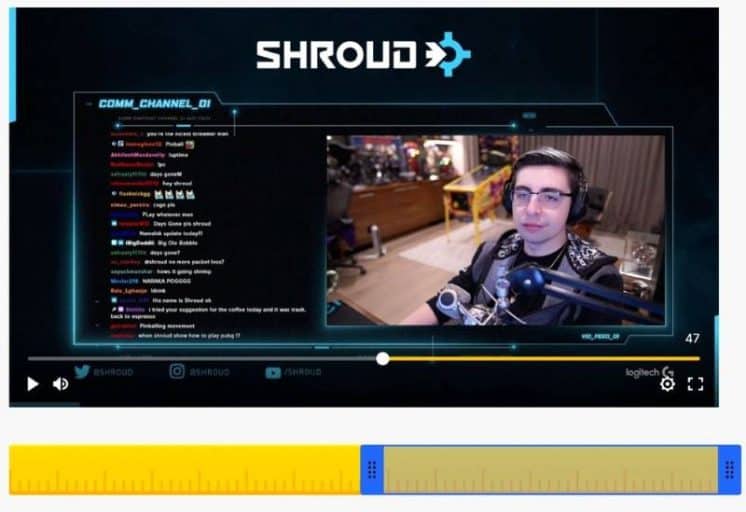
Once select the video that you want to create a clip, you need to start the scanning process and also place the seeker at the moment when you want your clip to start. Ensure that you have paused the video and moved your mouse over the video player.
Once done, hover your mouse on the bottom-right corner of the screen and tap on the Clip icon. Or, you could simply click Alt + X or CMD + X to open the Clipping feature.

Next, you need to drag the end of the blue-colored slider so that you can select where you want the video to end. Your videos can be as short as 5 seconds or as long as a minute.
Step 3: Publish The Twitch Clip
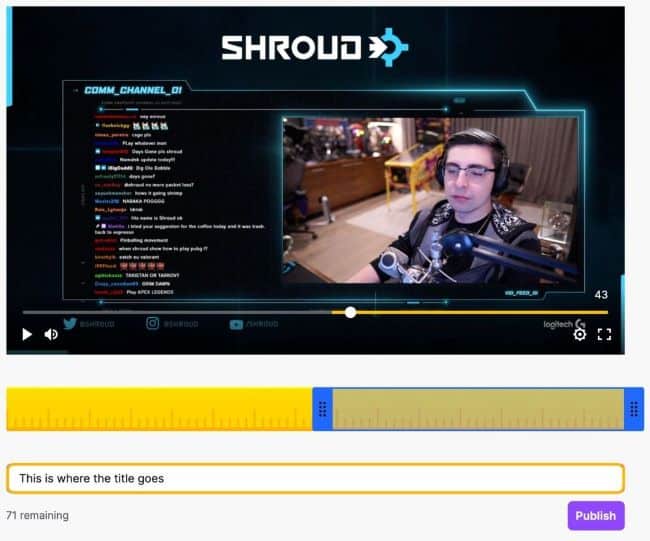
Once select the portion of the video that you want to save as the clip, you will notice a bar at the bottom where you need to type in the name or title of the video.
Ensure that the video’s title is compelling and short; an attractive title will make users eager to tap on the Play button.
You can only share a title with a maximum character of 100, including the spaces. Once you are done with everything, you simply need to tap on the Publish button. After that, the clip is ready to be shared on your social media platforms or with your friends.
Step 4 (Optional): Editing The Twitch Clip
Once you have learned how to create a clip on Twitch, you also have the choice to edit the clip. Now, various tools can help you do so. However, we made use of Kapwing, considered one of the best online video editors for all sorts of devices.
With the help of Kapwing, you will be able to add beautiful overlays, a watermark to protect your content, and add customized subtitles.
Step 1.
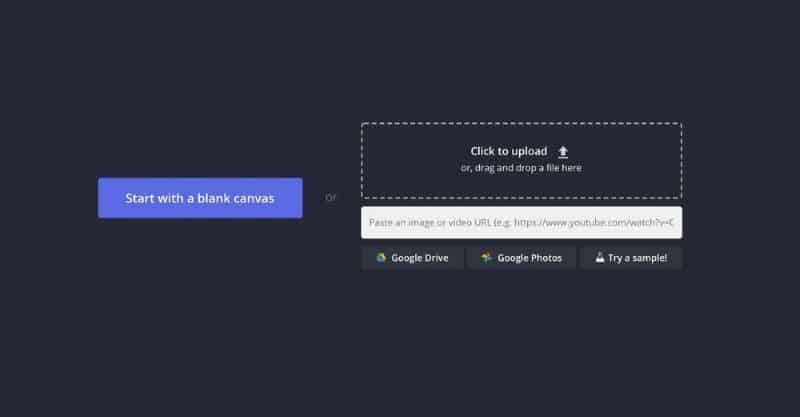
Once you visit the Kapwing official website, you simply need to click on the Start Editing process. Once done, you simply need to copy the link of your Twitch clip and paste it onto the URL space, which will take you to the Studio.
Step 2.
Next, you will be able to edit your clip as you desire. For instance, you can resize the clip and choose the appropriate output size. If you want to upload the clip to your Instagram Reels and Stories, the clip needs to be resized to a 9:16 ratio.
For YouTube, the appropriate size is 16:9. The crop tool can help you keep only the most interesting aspects of the Twitch clip.

Step 3.
If you want to further customize the Twitch clip and make it more accessible, you can also add subtitles via the Studio. From the drop-down menu, all you need to do is select the appropriate language.
You can also choose any of the available languages if you have a diverse audience. Next, you need to tap on Auto-Generate, which will add the captions automatically. If the videos are short, this process should not take a lot of time.

Step 4.
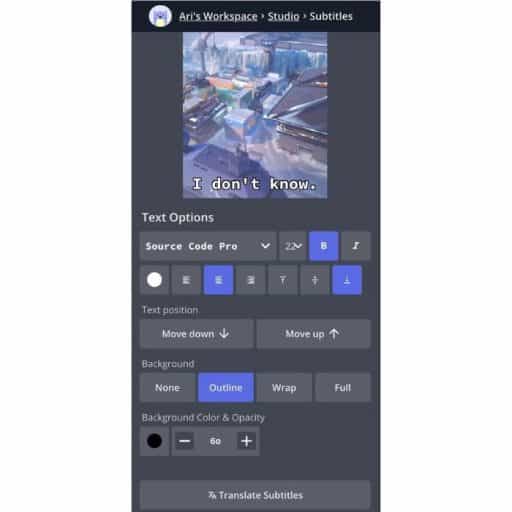
Once the captions have been added, you simply need to review them to correct any incorrect words or misspellings. You also have the choice to customize the captions, like changing the background, color, size, and font.
Experts would suggest that you avoid handwriting like cursive, which makes it difficult for the audience to read.
Also, ensure the color of the font contrasts with the background color. After making the required changes, you simply need to tap on the Done button.
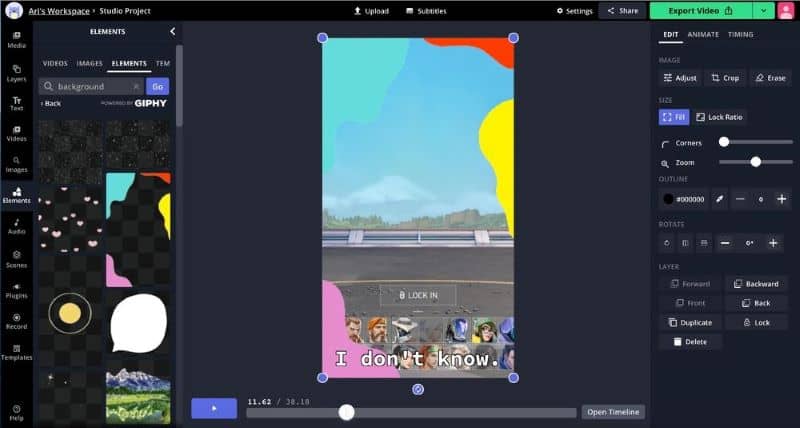
As for overlays like watermarks and logos, you can simply drag and drop them into the Studio and on the video file.
Alternatively, you can also upload the files into the media library. To change the size of the overlays, you can drag the blue corners and move the image across the canvas.
If you want the overlays to match the entire length of the video, you need to ensure that you drag the overlay layer to match the length of the video. Additionally, the Elements tab can help you find various fancy texts, circles, arrows, and backgrounds to support annotations.
Once done, you just have to tap on the Export Video button, which will save your Twitch clip. After that, the clip is ready to be shared with your friends or on your social media platforms.
Once you have learned how to create a clip on Twitch and want to share it on your social media platforms, ensure that you tap Kapwing on Instagram and Twitter so the company can view and check the videos. The company is always looking for Kapwing creators and will always support them.
Besides, are you wondering what Twitch chat logs are and how to check Twitch logs easily? Well, look no further, as this article explains everything for you.
Part 2. How to Create Clip on Twitch – for iOS and Android Devices
Now that you know how to create Twitch clips for your computer/laptop devices. Let us check out how you can do the same for your Android and iOS smartphones.
1. Download, install and launch Twitch on your mobile device.

2. Select the video that you want to clip or edit.
3. While the video is streaming, click on it.
4. In the case of iOS devices, you can simply click on ‘Share‘ and then ‘Create Clip.’ As for Android devices, the ‘Create Clip’ option can be seen at the bottom of the video player.
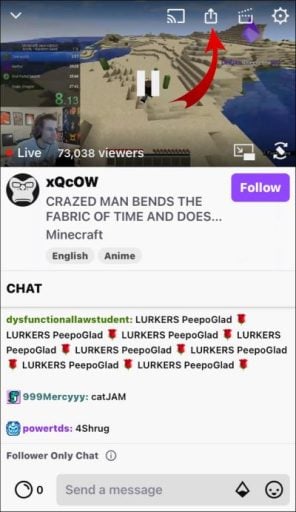
5. Once done, Twitch will start creating a 30-second video automatically.

6. If you still want to remove some parts from this 30-second clip, you can edit and remove the unwanted content.

7. Click on ‘Done‘ once you are satisfied with the clip.
8. Lastly, simply add a title for the clip, and it is ready to be published.

Tip: For sharing the clip with members in a chat room, all you need to do is click on the ‘Select Via Whisper’ option.
Part 3. Managing Twitch Clips
There may be times when you want to check all available clips made by you as well as other members of the channel. The steps to do so include the following:
1. Open the Twitch dashboard.
2. Here, head to the ‘Content‘ section and then click on ‘Clips.’
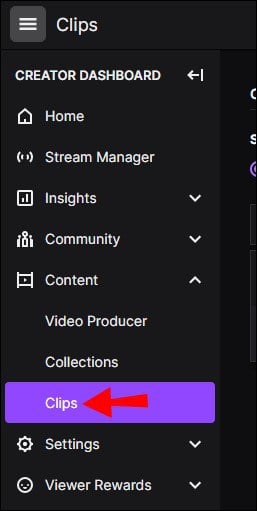
3. Head towards the ‘Clips Manager.’
4. Here, you can either select the ‘Clips of my Channel‘ or ‘Clips I Have Made.’
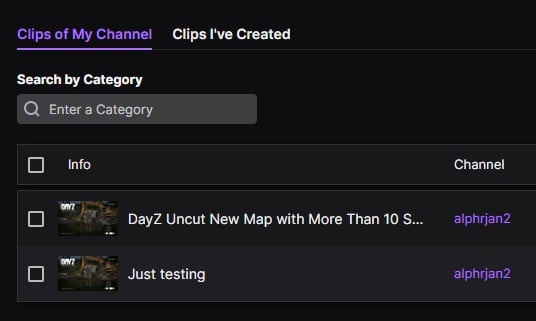
Simply follow the steps mentioned above, and all the clips in the channel will be sorted by views, keywords, engagement, recency, etc.
Part 4. How to Create Clip on Twitch on Xbox One?
Suppose you are an Xbox enthusiast and want to capture an epic moment while gaming; you can save at least 30 seconds of your game. The steps to do so include the following:
- Tap on the Xbox button on your controller if you want to record an event that has just occurred.
- Next, the Menu option will open up; tap on the X button here.
The last 30 seconds of that point will be saved and uploaded on Twitch.
Part 5. Deleting Twitch Clips
You always have the option of deleting Twitch clips; let us learn how you can do so:
1. Head over to the Twitch official website.
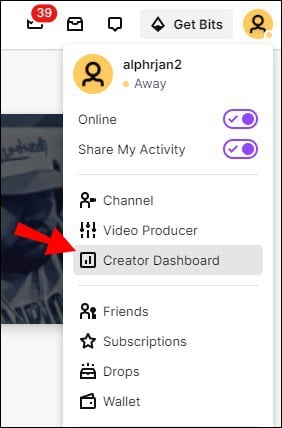
2. Tap on your Profile Photo.

3. On the next drop-down menu, tap on the Creator Dashboard.
4. Head over to ‘Content‘ and then click on ‘Clips.’

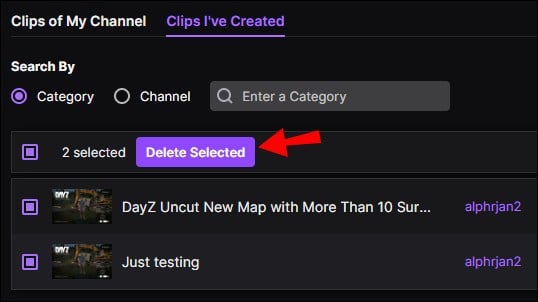
5. Choose the clips that you want to delete.

6. On the top of the clip, you will find a Trash icon; click on this icon.
7. Tap on the ‘Delete Selected‘ option.
The same process goes for deleting clips uploaded by other users on the channel.
Part 6. Sharing Twitch Clips
Here is a simple method of sharing your Twitch clips:
1. Head over to your Twitch channel.
2. Select the Twitch clip you want to share with your friends.
3. Here, you will find the clip link. Copy the URL.
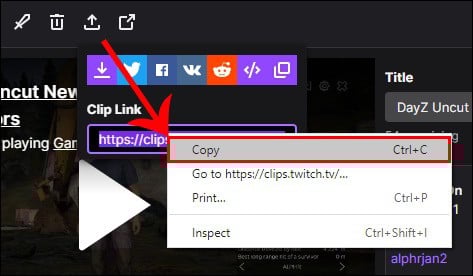
4. Paste the URL on your social media platforms.
Also read: How to delete Twitch account easily and how to whisper on Twitch?
FAQs
Here are some common FAQs related to Twitch and clipping:
The most viewed clip on Twitch is The Awakening. It has more than three million views.
While Twitch did initially have the option of downloading videos, the platform has removed it since. However, you can make use of Clipr to do the same.
All you need to do is copy the URL of the video on the Clipr platform, and you can save the video on your device. (Here: how to download Twitch Clips with no hassle)
If you want to use the Clip Command, you simply need to tap on Alt+X for Windows devices and Options+X for Mac devices.
You need to have a large audience when making a living out of any social media platform. Once you do, you can earn via merchandise, brand partnerships, sponsorships, and subscription.
Final Thoughts
Now that you have learned how to create clips on Twitch, you can easily create small clips and share them with your friends on the channels or other social media platforms. If you have any questions or queries, let us know in the comment section.


