
Resetting your Samsung device can be a frustrating experience when you are prompted to verify your Google account again before accessing your phone. Entering random details without remembering them leads to failed verification attempts, locking you out of your device.
The solution is learning how to properly bypass Google verification on your Samsung device after resetting it. This comprehensive guide will teach you several methods to bypass Google account verification and regain access to your Samsung device.
Overview of Google Account Verification
When you set up a Samsung device with a Google account, a security feature called Factory Reset Protection (FRP) locks the device to your Google account. FRP prevents other people from using your device if it is lost, stolen, or wiped.
The downside is that it also prevents you from accessing your own device after a factory reset until you enter the previously synced Google account credentials to verify ownership.
Bypassing Google verification allows you to use your Samsung device again without your original Google account by removing FRP.
Why You May Want to Bypass Google Verification
There are a few legitimate reasons why Samsung users want to bypass Google verification:
- You forgot the Google account details after a factory reset
- The old Google account was deleted or no longer exists
- You want to sell your used Samsung device and don’t want it linked to your account
- Switching the device over to a business or family member’s Google account
As long as you legally own the Samsung device, bypassing verification is an acceptable solution for gaining access to your phone and setting it up with a new Google account.
However, trying to bypass verification on a device that isn’t yours would be unethical and illegal.
6 Methods to Bypass Google Verification on Samsung
Here are the top methods Samsung users recommend for bypassing Google account verification:
1. Factory Reset Protection Bypass Tool (FRP Bypass)
This specialized FRP bypass tool is designed to get around Google verification requirements. Follow these steps:

- Download Factory Reset Protection Bypass Tool on a computer
- Transfer FRP Bypass tool APK file to a USB flash drive
- Factory reset your Samsung device
- On the Select Language screen, choose your language
- Skip the SIM card insertion steps
- Connect to WiFi and accept the EULA
- When prompted, connect your phone to the flash drive with an OTG cable
- Open file manager on your phone and install the FRP Bypass .apk file
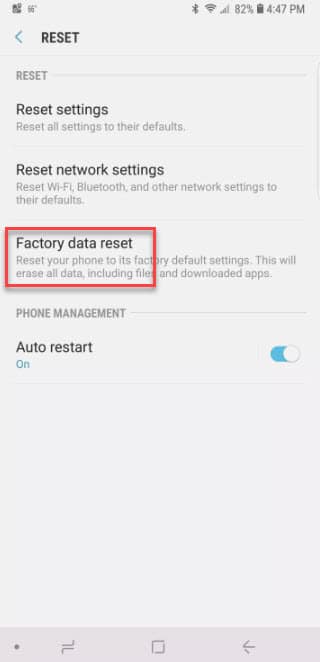
- Open Settings > Backup & Reset > Factory Data Reset > Erase Everything to bypass verification
This tool can bypass verification in just a few minutes if you have an OTG cable handy.
2. Tenorshare 4uKey for Android
Tenorshare 4uKey is a top-rated Android unlocking software capable of bypassing Google account verification easily.

Benefits:
- Bypass Samsung account verification after factory reset
- Remove Google account without password
- Regain full device access
- Delete device from old account
- Use a new Google account
Steps:
- Download and install Tenorshare 4uKey on your computer
- Connect Samsung device via USB
- Click Remove Google Lock (FRP)
- Confirm your device OS version
- Click Start and follow prompts to set a new unlock PIN
- Success! Google FRP lock bypassed
Tenorshare 4uKey offers the most convenient way to bypass a Samsung device with no OTG cable required.
3. RealTerm and FRP Tool Method
You can also use free tools Realterm and FRP Tool to bypass verification if you don’t have an OTG cable:

- Install RealTerm and FRP Tool on your computer
- Open RealTerm and enter your device’s port code
- Enable Halt Duplex in RealTerm settings
- Send the “at+ creg?\r\n?” or “atd1234;\r\n” command
- When the dial pad appears on your device, FRP is bypassed
While a bit more technically involved, this method works without an OTG cable.
4. dr.fone – Android Screen Unlock
dr.fone – Android Screen Unlock is a professional unlocking toolkit for bypassing Samsung verification:

- Download and install dr.fone on your computer
- Connect Samsung device via USB
- Click Screen Unlock
- Click Start and put device into Download Mode
- dr.fone will download recovery package to bypass verification
dr.fone makes it easy to bypass Google verification on Samsung with a high success rate.
5. Factory Reset Without Internet Access
You can factory reset your device without internet access to avoid verification:
- Go to Accounts and remove Google account
- Turn off WiFi and mobile data
- Go to Settings > Backup and Reset > Factory Data Reset
- Set up device without internet – skips verification
This method works but means you lose access to data backups.
6. Use FRP Bypass APK
An FRP bypass APK can also get around verification:
- Download FRP bypass APK on a USB drive
- Connect USB OTG cable to Samsung device
- Install APK and open Settings
- Go to Backup and Reset and Factory Data Reset
- Set up device with new Google account
Reliable FRP bypass APKs like LockTrust can be effective.
Choosing the Best Samsung Bypass Method
The most convenient and effective bypass method for most users is Tenorshare 4uKey for Android. It offers a high Samsung bypass Google verify success rate without needing an OTG cable.
Factory Reset Protection Bypass Tool is also very reliable if you have an OTG cable. For advanced users comfortable with technical tools, the RealTerm method works too.
Bypassing Google Verification Safely
A few tips to ensure you bypass Samsung verification safely:
- Only bypass devices you legally own
- Backup data before factory reset
- Download software from official sources
- Turn off Find My Device before resetting
- Remove SIM card and SD card before bypass
As long as you use bypass methods appropriately on your own device, you can feel confident regaining access to your Samsung phone.
Frequently Asked Questions
Here are answers to some common questions about bypassing Google verification on Samsung:
Is bypassing Google verification legal?
Bypassing verification is legal on your own personal device for legitimate reasons. Trying to bypass verification on a phone that isn’t yours would be unauthorized access.
Will these methods work for non-Samsung devices?
The methods here are specifically tailored for Samsung devices. Other brands like Google Pixel would require different bypass techniques.
Is it safe to install an FRP bypass APK?
Yes, installing a bypass APK from a reputable source on your own device is safe. Just be sure to only download APKs from trustworthy sites.
What if I can’t download an APK file onto my device?
Make sure your device storage isn’t full and you have an active internet connection. If you still have issues, the website you’re downloading from may not be working properly.
Can I use these methods to unlock someone else’s Samsung phone?
Absolutely not! Bypassing verification on a device you don’t own would be unethical and illegal. These methods are solely for personal use on your own device.
I forgot my Google account password. Can I still bypass verification?
Yes, you can bypass verification without needing your old Google password by using the methods outlined above. Just be sure to add a new Google account after bypassing.
Will I lose all my data if I bypass verification?
If you factory reset your device before bypassing, you will lose data. However, methods like Tenorshare 4uKey can bypass verification without wiping data.
Key Takeaways
- Bypassing Google verification allows you to use your Samsung device after a factory reset without your original Google account
- Legitimate reasons to bypass include forgetting account details, deleting the account, or transferring device ownership
- Do not attempt to bypass verification on a Samsung phone that isn’t yours
- The best bypass methods are Tenorshare 4uKey, FRP Bypass Tool, dr.fone, and using an FRP bypass APK
- Turn off Find My Device and remove SIM/SD cards before attempting bypass
- Only download bypass tools and APKs from reputable sources for safety
- Use these Samsung bypass Google verify guides ethically and legally on your personal devices
Conclusion
I hope this comprehensive Samsung bypass guide gives you the knowledge to properly regain access to your Samsung device after a factory reset. Bypassing Google verification can be frustrating, but is completely doable with the right tools and techniques.
The key is using reliable methods like Tenorshare 4uKey and downloading trustworthy bypass apps. Avoid any shady workarounds that could risk your data security.
With this helpful reference, you can now bypass verification, set up a new Google account, and start enjoying your Samsung device once again!


