In terms of modern communication, FaceTime has been a boon to the world. We can communicate with individuals from all around the world thanks to communication apps like FaceTime.
And there are times when we want to remember these calls, which is why we will show you how to screen record FaceTime with sound on iPhone or PC. Furthermore, it will address commonly asked questions about screen recording on FaceTime.
Not only is the software popular for casual family gatherings, but it is also extensively used by professionals to stay in touch with their coworkers and team.
There is a reason why most people are so interested in learning how to screen record FaceTime with sound. Apple prohibits this function by default for a variety of reasons, including privacy. However, there is a solution.
So, can you capture audio through Facetime? You certainly can. We will demonstrate several tried-and-true solutions for the iPhone and Mac.
Method 1. How to Screen Record FaceTime with Sound on iPhone
You have come to the right website if you own an Apple phone and want to know how to screen record FaceTime with sound on iPhone. Unlike most Android smartphones, which require third-party applications for screen recording, the iPhone does not require such apps.
The iPhone’s screen recorder is enough for capturing the screen while on a FaceTime chat. Apple included a built-in screen recorder in iOS 11, although it is still in the early stages of development.
However, the utility is rather buggy; while it can record the screen correctly, the problem comes when you are going to record the audio.
The application does not enable users to capture audio for numerous apps, including FaceTime, which is one of them. The limitation on voice recording is not largely due to technology but rather to legal considerations.
Its restriction will also have a significant influence on the piracy industry. But there is no need to worry because there are several methods you can put to use.
Steps to Screen Recording Facetime Video As Well As Sound
1. Launch FaceTime and Begin Your Call.
The first thing you need to do when trying to screen-record a FaceTime call is to launch the application and initiate the call. After the video call has begun, you may start recording it by using the instructions below.
2. Launch Control Center on Your Apple Phone.
Swipe down from the top of the screen to access your device’s control panel. In case the feature is not there in the control panel, you can access it from the settings.
3. Start Recording by Clicking the Gray Dot on the Screen.
In the lower part of the control panel, a grayed dot will emerge. When you click on that dot on the screen, a timer begins to start recording.
Do note that the recording will begin when you tap on the Screen Recorder; however, this will just record the screen and will not include any sound. If you want to screen record FaceTime with sound, you will need to do one more step.
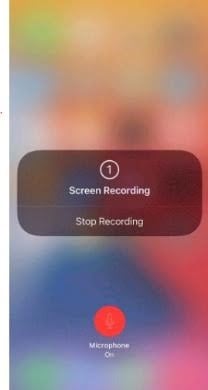
When you long-press on the Screen Recorder, you will see all of your recording choices. It shows a microphone icon that is grayed out and indicates Microphone is off.
When you tap on the Microphone icon, the sign turns colored, and the message stated below switches to Microphone On. This will enable you to record sounds from the microphone. However, you will have to tweak the volume levels for better sound quality.
4. Click the Red Dot.
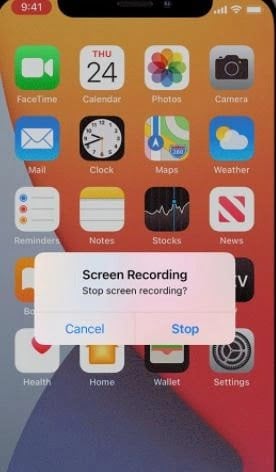
When you are finished recording, tap on the red dot at the top to end it. After you have finished recording the call, tap the red dot at the top of the screen to stop it.
5. Confirmation for Stopping the Recording.
A notification will show up on the screen after you tap on the red dot. The notification will request permission to cease recording. The screen capture will be kept in your gallery when you select stop recording.
Method 2. Screen Record with DU Recorder
If you do not wish to utilize your iOS’s built-in screen recorder, or if the technique above didn’t seem to work, an amazing software like DU Recorder will do the trick. This application is completely free to download and has a high level of trustworthiness.
Following installation, follow the on-screen steps to enable the screen recorder and specify where you want any files generated by the application to be saved.
Besides, if you are experiencing issues like the FaceTime camera not working, here are the top solutions for you.
Steps on How to Screen Record Facetime with Sound on iPhone
1. Launch FaceTime and Begin the Call.
The obvious first thing to do is to launch FaceTime and begin your call.
2. After You Have Installed the Software, You Will Notice an Orange Button on the Screen.
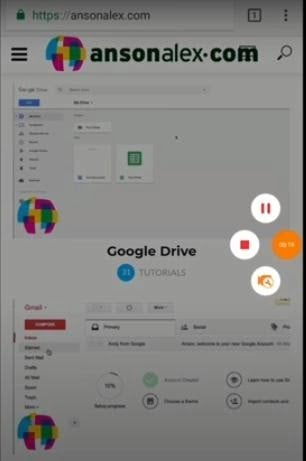
This software is available for installation on the App Store. To start recording, click the orange button at the bottom of your screen.
After you have begun recording, you should notice three more circles that allow you to pause the recording, stop, or navigate to settings.
3. To Adjust the Recording Configurations, Select the “Settings” Option.
In the initial step, you effectively started recording. You may, however, change the preferences by choosing the “settings” button on the menu.
A panel with numerous choices will display, and you may adjust the toggle switches to pick all of the recording settings you wish.
4. By Selecting the Video Button at the Top of the Screen, You May Record Live.
Once you have gone through all of the selections, you may record live videos by selecting the video button at the top of the screen, or you can see any snapshots or photographs you have captured.
Method 3. How to Screen Record FaceTime With Sound on Mac
FaceTime is most often used on an iPhone, although it may also be done on a Mac computer.
If you are looking for how to screen record FaceTime with sound on your Mac computer, then you should know that QuickTime is the most convenient way to record FaceTime. It is already set up on macOS and does the job.
- QuickTime may be accessed via the launcher or the Applications menu.
- Choose File and then New Screen Recording.
- Within QuickTime, click the little down arrow marked options next to the record button.
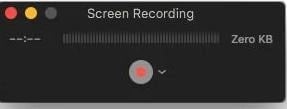
- Choose MacBook Microphone.
- Navigate to the File menu and choose Quicktime Player.
- To begin your call, use FaceTime.
- Choose QuickTime to record the full screen, or drag and drop to capture only a piece of it.
- Once you are ready, press the Record button.
- When you are finished, click the stop recording icon.
QuickTime is Mac’s default screen recorder, and it will move out of the way once you start recording. If you are making instructional videos, you may record mouse clicks and instructions or just have it highlight your FaceTime window. It captures both sound and video after the microphone is set up.
Thus it has more built-in functions than an iPhone device or iPad. While QuickTime does a decent job when you want to know how to screen record FaceTime with sound on iPhone, there are some other applications that can do better.
There are a variety of alternative paid applications available that will all do the job. They are not free. However, they have a lot more capabilities than QuickTime, so if you do this a lot and want more editing options, it is worth a look.
Method 4. Screen Record With Wondershare DemoCreator
If you wish to screen record on FaceTime with sound on your PC, you should absolutely download Wondershare DemoCreator. This application is an advanced video recorder that is compatible with both Windows and Mac systems.
FaceTime, on the other hand, can only be captured on Mac, something that DemoCreator completely supports. More astounding, this application has a facial recognition capability that uses Artificial intelligence to recognize your face, adding to the enjoyment of your recording experience.
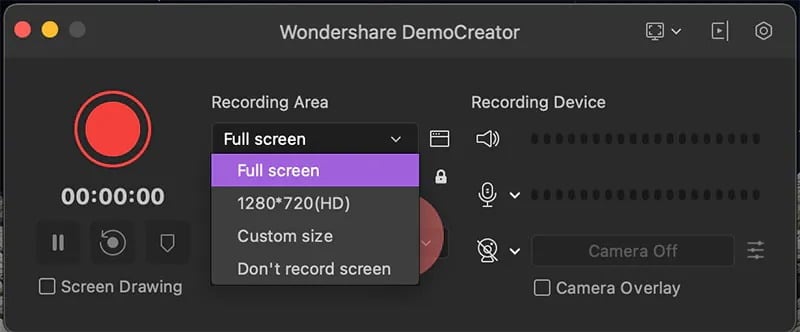
- Download DemoCreator on the PC; the software will start immediately after installation.
- When you tap on “New Recordings” within the home screen, a new box will appear. If necessary, you can activate the microphone recording.

- Choose the portion of the screen you wish to record and then press the red icon to begin recording.
Something to Keep in Mind
If you want to record something, you must warn the other person. It is also critical to recognize that your call might also be recorded at any time by someone else.
Many nations and also local cities have particular rules involving recording without authorization, so be certain you are aware of the laws that regulate your behavior before capturing a FaceTime chat. You should not have any issues as long as you follow the law.
Frequently Asked Questions
- Can I record a FaceTime call without the other person knowing? No, it’s advisable and often a legal requirement to inform the other party before recording a FaceTime call.
- Why is there no sound in my screen recording? Check to ensure that the microphone is turned on in your screen recording settings.
- Can I screen record FaceTime on all iPhone models? Screen recording is available on iPhone models from the iPhone 5s and above, provided they are running iOS 11 or later.
- Where are my screen recordings saved on my Mac? The screen recordings are automatically saved to your desktop or the location you’ve selected in the ‘Options’ menu of the Screenshot toolbar.
- Can I screen record other video calls apart from FaceTime? Yes, the screen recording feature can be used to record any form of video call on your iPhone or Mac.
Final Thoughts
We hope we have successfully taught you how to screen record on FaceTime with sound on an iPhone with the help of this article.
So, record those calls and share them with your friends and family!


